By Matthew Millar R&D Scientist at ユニファ
Purpose:
This is part V of the MAG (Multi-Model Attribute Generator) paper I am working on. This post will look at locating bags, handbags, and suitcases. This will be a bit different than the last couple of posts as it will be an object detection based approach.
If you missed some of the other parts of this series take a look here:
Multi-Model Attribute Generator - ユニファ開発者ブログ
MAG part II - ユニファ開発者ブログ
MAG Part III Upper Body - ユニファ開発者ブログ
MAG Part IV Color - ユニファ開発者ブログ
Lessons Learned:
Well, there are no real lessons that I learned from the last post as this is a different type of model, a detector and not a classifier. Even though it will be used as a classifier in the end, right now all I care about is if the person is or is not carrying a backpack, a handbag, or a suitcase. But we will be finetuning a pre-trained classifier called ImageAi (https://imageai.readthedocs.io/en/latest/) This is a detector AI system that is easy to use, install and quickly make predictions with no or very little changes to the training.
Retraining the system:
I won’t go into a lot of detail about how to retrain the system as it is covered very well in the documentation, so I will give a quick overview of the process here. The first thing that must be done is setting up your dataset annotations using a PascalVOC format that is used by YOLO3. This can be done by; getting the objects you want to detect, collecting the images needed (200+ is the recommendation per class/object), create a main folder for each object with a train and validation folder inside each main object folder. The train and test split should be the standard 80/20% split. There should be annotations for each image in each train/validation folder.
Now, the code is a lot easier than other YOLO3 retainers as most of the boilerplate code and management are done for you.
from imageai.Detection.Custom import DetectionModelTrainer
trainer = DetectionModelTrainer()
trainer.setModelTypeAsYOLOv3()
trainer.setDataDirectory(data_directory="Bags")
trainer.setTrainConfig(object_names_array=["backpacks", “handbags”, “suitcases”], batch_size=4, num_experiments=200, train_from_pretrained_model="pretrained-yolov3.h5")
trainer.trainModel()
This retraining is not mandatory as the three objects that I wanted to test were already included in the pre-trained model. However, by retraining the YOLO3 weights, it will better detect the objects that are specified in the Market1501 dataset instead of missing some. This does take some time to collect all the data point but it is worth the effort as it can increase the accuracy for a specific dataset by 10 to 30% due to the type and quality of data that is being used.
Do You Have a Bag?
Now let’s see how to use the retrained model for prediction/detection of a bag or not. There are two ways that I use this; one with Keras and one with OpenCV. I personally prefer doing it with Keras as you won't have to have an output image to the detector. If you put an image indirectly to the detector (which is possible) you will have to give an output file. But using an array-like reading in an image using Keras or OpenCV will change it into an array and you will not need to have an output file.
So first let’s import everything we need to use;
import os
from imageai.Detection import ObjectDetection
from keras.preprocessing import image
import cv2
import matplotlib.pyplot as plt
import numpy as np
Next, let’s create the detector to use
# Set up detector
detector = ObjectDetection()
use_yolo = True
if use_yolo:
    detector.setModelTypeAsYOLOv3()
    detector.setModelPath("yolo.h5")
else:
    detector.setModelTypeAsRetinaNet()
    detector.setModelPath("resnet50_coco_best_v2.0.1.h5")

# Set up custom detector to look at only bags and nothing else the object detector is trained on
custom = detector.CustomObjects(backpack=True, handbag=True,suitcase=True)
detector.loadModel()
Note we have a custom set of rules for the detector which limits what it returns to only what we want. In this case, our three classes backpack, handbags, and suitcases.
Next, we will run the image through the detector which will look for the above classes:
# Accpets raw images
# detections = detector.detectCustomObjectsFromImage(custom_objects=custom,
#                                                    input_image= test_img,
#                                                    output_image_path="image3new-custom.jpg",
#                                                    minimum_percentage_probability=60)

img = image.load_img(test_img)
img = image.img_to_array(img)
detections_keras = detector.detectCustomObjectsFromImage(custom_objects=custom,
                                                   input_image= img,
                                                   input_type='array',
                                                   minimum_percentage_probability=60)
Note the two differences between using an array and a raw image.
Then we store the results and can get the name, bounding box points, and percentage for each object. We can see a function for the whole thing.
def process_img_keras(img_path, detector):
    img = image.load_img(img_path)
    img = image.img_to_array(img)
    detection =  detector.detectCustomObjectsFromImage(custom_objects=custom,
                                                   input_image= img,
                                                   input_type='array',
                                                   minimum_percentage_probability=70)

    test_results = []
    for eachObject in detection:
        test_results.append([img_path, eachObject["name"], eachObject["box_points"], eachObject["percentage_probability"]])

    return test_results
Now display the results with this code.
def print_results(img_path, result):
    if not result:
        cv_img = cv2.imread((img_path))
        plt.axis("off")
        plt.imshow(cv2.cvtColor(cv_img, cv2.COLOR_BGR2RGB))
        plt.show()
    else:
        name = result[0][0]
        x,y,x2,y2 = result[0][2]
        percent = result[0][3]

        cv_img = cv2.imread((img_path))
        cv_img = cv2.rectangle(cv_img, (x, y), (x2, y2), (0,255,0), 1)

        plt.axis("off")
        plt.imshow(cv2.cvtColor(cv_img, cv2.COLOR_BGR2RGB))
        plt.show()
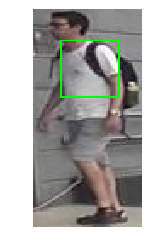
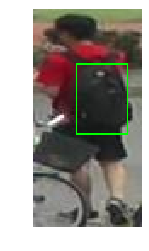
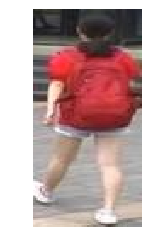
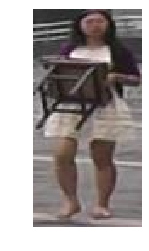
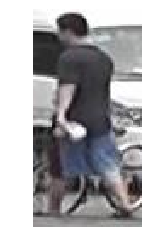
Looking at the results the output is quite good but has some issues with very hard images where the color is too close to the shirt or clothing so it cannot see the bag. But it did not get the lady with a chair wrong so that is a good thing.
| Bag | Bag | Bag | No Bag | No Bag |
 |
 |
 |
 |
 |
Conclusion:
The results were as expected from this as object detection once done correctly is quite hard to mess up. Therefore, it is always advisable to use a pre-trained version over doing it yourself. You can make it from scratch depending on your task, however, it will never be as robust as these models that have been trained on over 1000 different classes and millions of images. So, this is a successful method for finding bags in an image that was quicker and possibly more accurate than building a classifier for each type of bag and people without bags. We would need a lot more data than what we used and would have to annotate a lot more than just 200 images per class.
What’s Next:
This concludes the MAG code along part of the MAG system. I will now start to work on improving the accuracy of everything and then tying them together in a final model.
For now, we will start to turn our attention to IoT and Computer Vision on Edge devices. We will start to work with Raspberry Pi and Google Coral in our next set of blog post All through XMAS!