By Matthew Millar Research Scientist at ユニファ
Purpose:
This blog will cover the progress of an IoT project for computer vision. The final goal will be to locate an individual and to track this individual to see where they are in a room and to tell if they go near a marked area in the room. This will involve; person detection, tracking, and distance measurements from a Raspberry Pi.
Last time we set up the Pi and got things ready to go.
My 2nd Favorite Pi - ユニファ開発者ブログ
This blog post will look at setting up the Pi so it can stream the video feed from a camera. We will cover how to install OpenCV on the Pi and set up a synchronized camera feed from a special Camera Hat which will be discussed later!
IoT:
The IoT is mainly about connecting everything around us to make a holistic data acquisition system. This means all the data that you create is gathered by sensors and sent to the mother node! Let’s break down IoT.
In a nutshell, IoT is a collection of Node or edge devices that gather data by sampling the world around them. This data can range to a large amount because of the different data that can be collected. It can be temperature and weather data, camera feeds, IR sensors, tablets, refrigerators and appliances, and wearable devices to name a few. This is not a comprehensive list as this list is endless and getting longer every day.
Cameras are one of the most common methods for gathering data in an environment. They can be considered the first edge device that was implemented. The world's first security camera came from a chicken farmer who wanted to see who stole his eggs back in 1933. So, the farmer rigged up a camera (like that 35mm film camera professional (use) and hipster have) and set a trap so when the door to the chicken hut was opened the camera would take a picture. He even went so far to put a tin can to make a noise and have the thief look up at the camera [1]. This was the first recorded instance of a security camera. (Yes, the thief was captured and was found guilty).
OpenCV on Pi:
We will need at least one library for using cameras on the Raspberry Pi. That one will be the most common one to use in computer vision projects, OpenCV. This can be complex to install as the older method
pip install opencv-contrib-python
It does not work well with Opencv4 on some Pis. (I tried and failed). So I had to install it from the source. We will go through the steps one by one to get started.
First things first let us get things ready for OpenCV
Update and upgrade the OS first (just like Linux)
sudo apt-get update && sudo apt-get upgrade
Next, we need cmake installed to build the files later.
sudo apt-get install build-essential cmake pkg-config
And then the I/O packages for images
sudo apt-get install libjpeg-dev libtiff5-dev libjasper-dev libpng-dev
And I/O packages for videos
sudo apt-get install libavcodec-dev libavformat-dev libswscale-dev libv4l-dev
sudo apt-get install libxvidcore-dev libx264-dev
We need the GTX development libraries for OpenCV so let’s get them too
sudo apt-get install libfontconfig1-dev libcairo2-dev
sudo apt-get install libgdk-pixbuf2.0-dev libpango1.0-dev
sudo apt-get install libgtk2.0-dev libgtk-3-dev
And a library for aiding in Matrix Manipulation
sudo apt-get install libatlas-base-dev gfortran
And finally the HDF5 and QT GUI
sudo apt-get install libhdf5-dev libhdf5-serial-dev libhdf5-103
sudo apt-get install libqtgui4 libqtwebkit4 libqt4-test python3-pyqt5
Now with all that installed and ready to go let's make our environment to use OpenCV in
Step 1 get and install pip (if you don’t have it already)
wget https://bootstrap.pypa.io/get-pip.py
sudo python get-pip.py
sudo python3 get-pip.py
sudo rm -rf ~/.cache/pip
Now the virtual environment manager
sudo pip install virtualenv virtualenvwrapper
We will update the bashrc file now with the needed information
vim ~/.bashrc
and then add this to the bottom of the file (adjust as needed but if you followed the above exactly then there should be no adjustments)
# virtualenv and virtualenvwrapper
export WORKON_HOME=$HOME/.virtualenvs
export VIRTUALENVWRAPPER_PYTHON=/usr/bin/python3
source /usr/local/bin/virtualenvwrapper.sh
Exit out of the bashrc file and run source to apply all the changes to the bashrc file
source ~/.bashrc
Finally, we can create a new virtual environment
mkvirtualenv myenv_name -p python3
Activate the environment using
Source /path/to/env/myenv_name/bion/activate
And install some needed dependencies.
pip install "picamera[array]"
pip install numpy
Now we can finally get to installing OpenCV from the source
cd ~
wget -O opencv.zip https://github.com/opencv/opencv/archive/4.1.1.zip
wget -O opencv_contrib.zip https://github.com/opencv/opencv_contrib/archive/4.1.1.zip
unzip opencv.zip
unzip opencv_contrib.zip
mv opencv-4.1.1 opencv
mv opencv_contrib-4.1.1 opencv_contrib
This will get all the code you will need to build and install OpenCV
The next step is to make the swap file larger as if you don’t you will not be able to install OpenCV as it takes up too much room
sudo vim /etc/dphys-swapfile
and change the swap size from 100 to 2048. But later on, you will change it back to 100 as using 2048 can burn out your SD card quickly.
# set size to absolute value, leaving empty (default) then uses computed value
#   you most likely don't want this, unless you have an special disk situation
# CONF_SWAPSIZE=100
CONF_SWAPSIZE=2048
After the install, you will change it back to 100 Stop and start the swap service
sudo /etc/init.d/dphys-swapfile stop
sudo /etc/init.d/dphys-swapfile start
Now go back to your virtual environment to work on it. And then we will start to build and configure OpenCV
cd ~/opencv
mkdir build
cd build
cmake -D CMAKE_BUILD_TYPE=RELEASE \
    -D CMAKE_INSTALL_PREFIX=/usr/local \
    -D OPENCV_EXTRA_MODULES_PATH=~/opencv_contrib/modules \
    -D ENABLE_NEON=ON \
    -D ENABLE_VFPV3=ON \
    -D BUILD_TESTS=OFF \
    -D INSTALL_PYTHON_EXAMPLES=OFF \
    -D OPENCV_ENABLE_NONFREE=ON \
    -D CMAKE_SHARED_LINKER_FLAGS=-latomic \
    -D BUILD_EXAMPLES=OFF ..
What makes this special is that ENABLE_NEON is on so that OpenCV is optimized for the ARM processor.
Now you can run
cmake
But make sure you are inside the build file use pwd to make sure it is in the directory opencv/build/
Next step after the build is done using the
make -j4
Command to compile the code. The -j4 will make it faster as it will use all 4 cores of the Pi. You can leave off the -j4 to avoid possible race conditions if it freezes during install. This will take a hot minute so get lunch and possibly dinner and come back.
Now you can run
sudo make install
sudo ldconfig
The next step is to change the swap size back in the above steps.
Now we need to make a sym-link from the Opencv to python.
cd /usr/local/lib/python3.7/site-packages/cv2/python-3.7
sudo mv cv2.cpython-37m-arm-linux-gnueabihf.so cv2.so
cd ~/.virtualenvs/cv/lib/python3.7/site-packages/
ln -s /usr/local/lib/python3.7/site-packages/cv2/python-3.7/cv2.so cv2.so
Now if all that worked then you can check to see if it actually worked or not (took me 3 tries so don’t get disheartened).
Activate your virtual environment and run the following commands
Python
>>>Import cv2
>>>Cv2.__version__
The Camera Man:
Now we can turn our attention to building the camera system for the project. Looking at the final goal of the project of distance estimation we will need a synchronized set of cameras. Using two cameras that are calibrated and synchronized can greatly improve the accuracy of distance/depth predictions [2]. The camera kit that I will be using will be the Arducam 5MP Synchronized Stereo Camera Bundle Kit for Raspberry Pi that can be bought from Uctronics [3]. Using this chip will handle all the synchronization issues that come with dual camera feeds.
The Setup:
The setup is pretty straight forward. The first step is to connect the ribbon cable from the ArduCam chip to the camera input on the Pi.
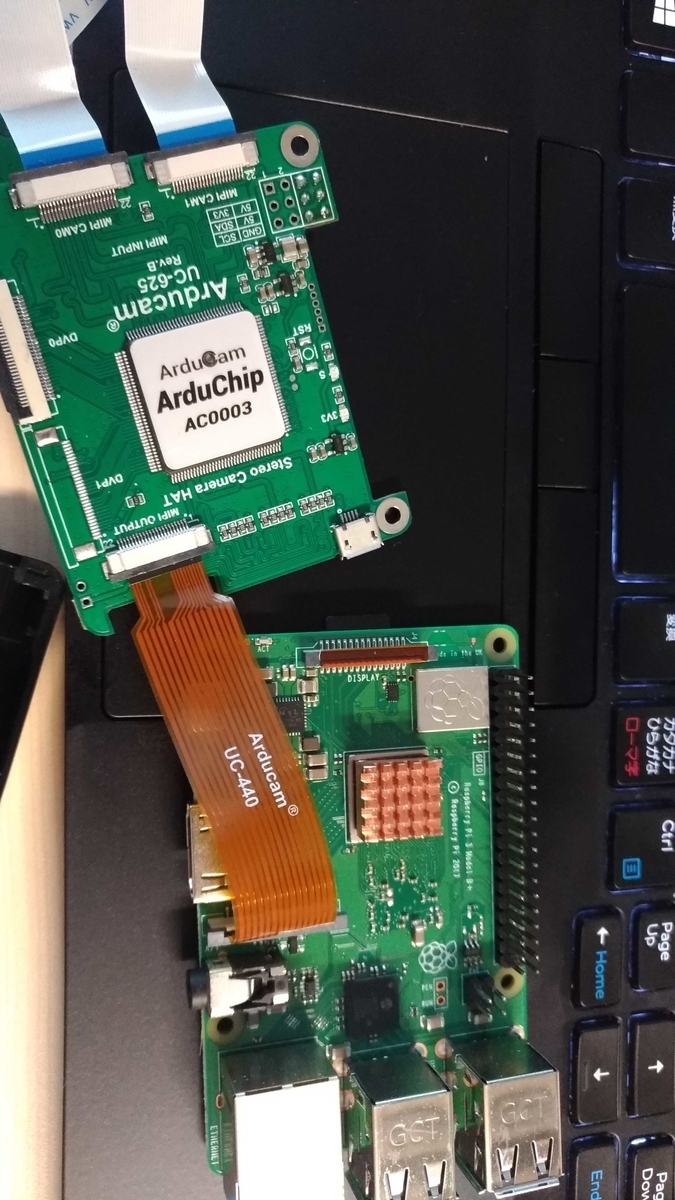
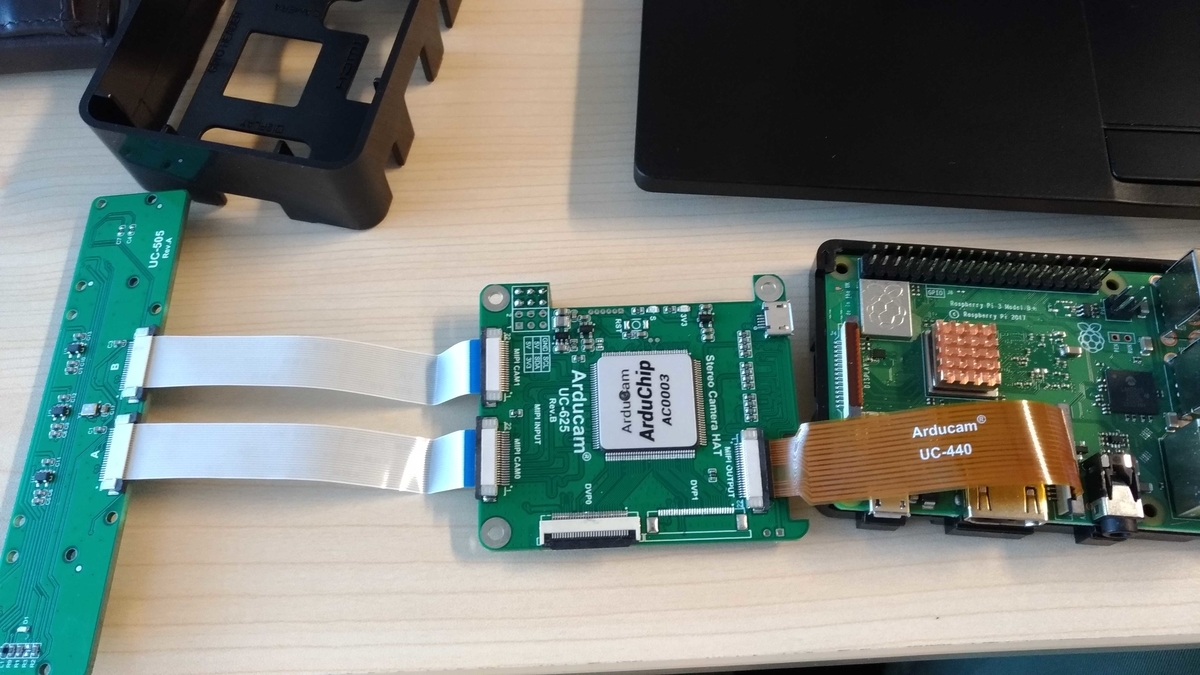
Then place the pins into the right connectors on the HAT this will be the topmost pins on the Pi.
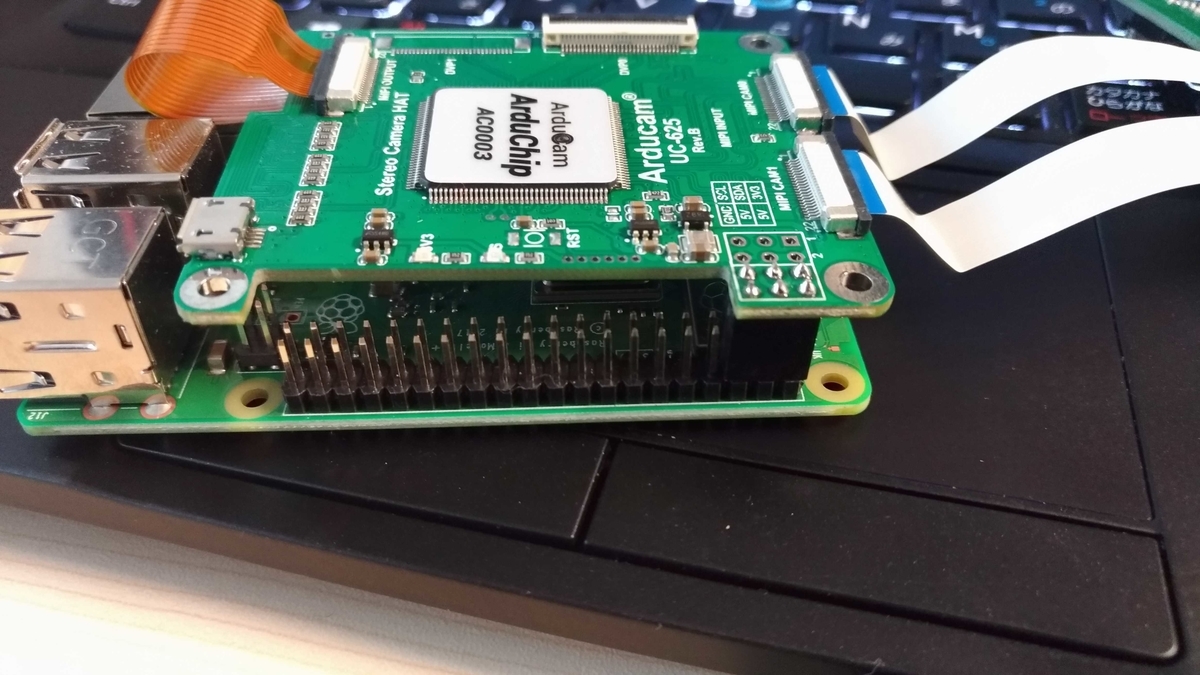
And that's it you are set up and ready to begin installing more packages and dependencies! Let's plug all out stuff in the pi and your setup should look something like this
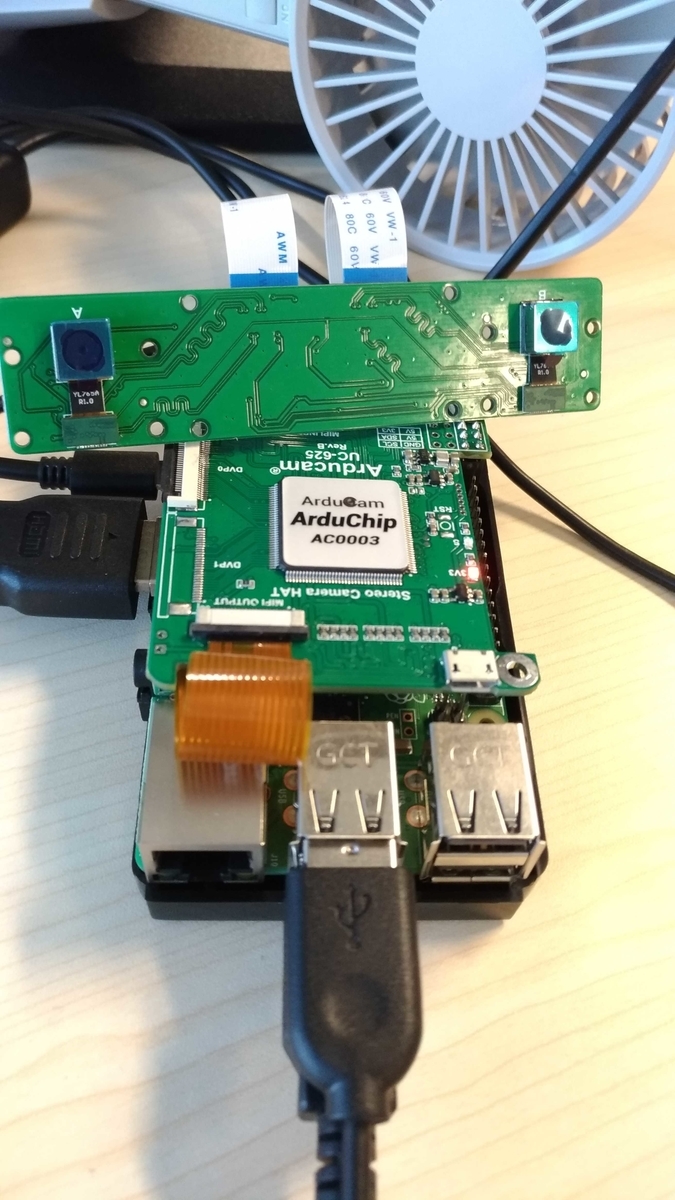
Now even MORE setup and setting changes!
The first step is to enable the camera. On the Pi Desktop go to
Preferences->Raspberry Pi Configuration->Interfaces.
Then Enable the Camera, SSH, VNC, and I2C by clicking the enable radio button. The next step is to download the SKD for the ArduCam chip from GitHub
git clone https://github.com/ArduCAM/MIPI_Camera.git
Go into the RPI folder in the repo and run this command
chmod +x ./enable_i2c_vc.sh
./enable_i2c_vc.sh
This will enable the i2c_vc.
Guess what we need even more Packages again! So run these commands to install them both
sudo apt-get update && sudo apt-get install libzbar-dev libopencv-dev
This will set you up well so you are finally finished installing packages.
The next step is to make the install the code from the repos so do this
cd MIPI_Camera/RPI
make install
Next, compile the examples for testing
make clean && make
And finally, run it in preview mode (a C program from the chips creators).
./preview_setMode 0
To actually test out your code. If everything worked out ok you should start to see an image being streamed from the device to your Desktop like this
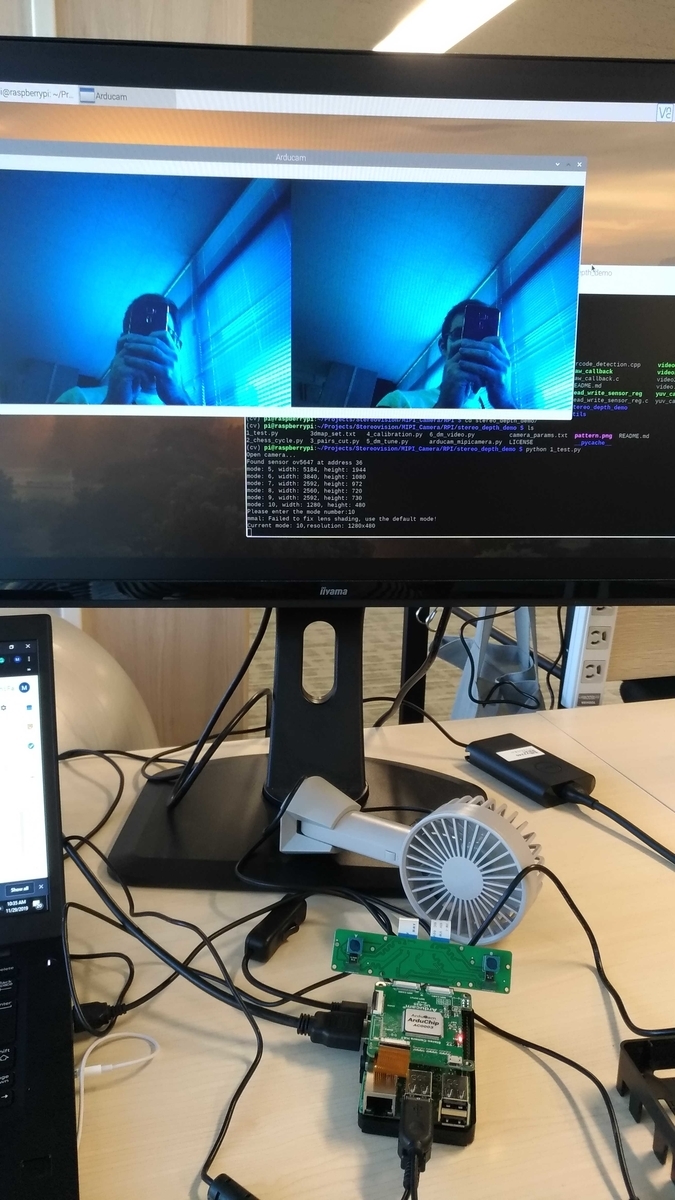
or this
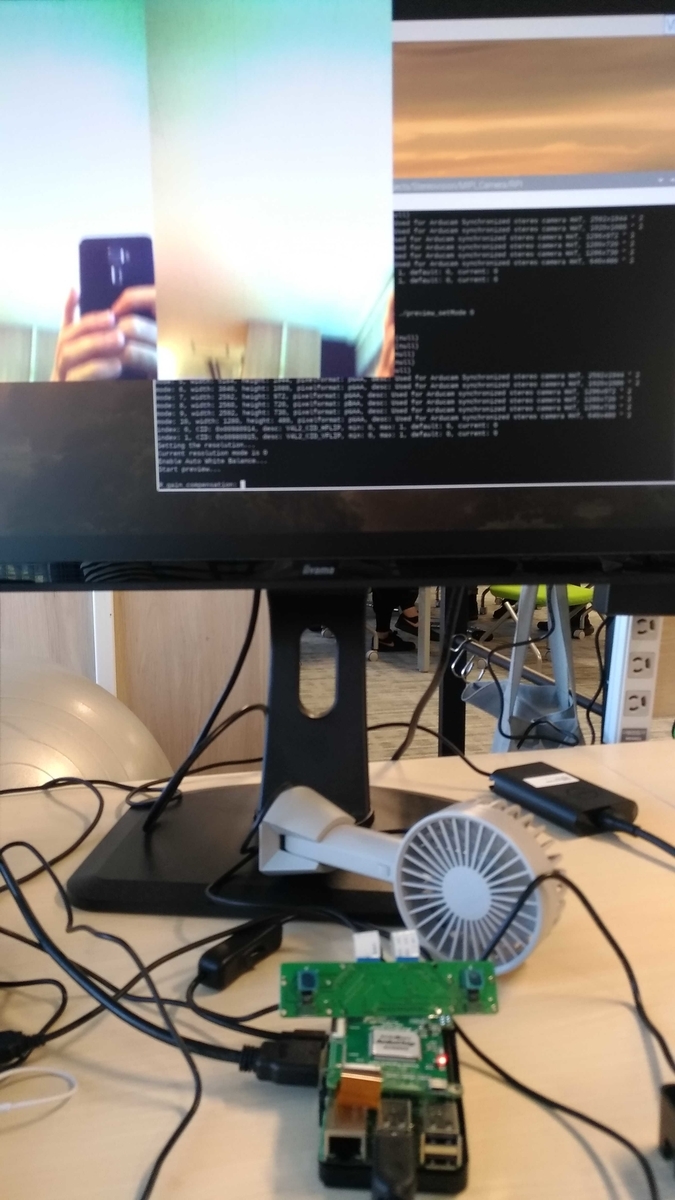
And there you have it you now have an RPi 3B+ with a stereo camera that is synchronized and ready for the next steps.
Next time I will install TensorFlow and start with a simple object detection AI.
Sources:
[1] https://innovativesecurity.com/the-worlds-first-security-camera/
[2] Peleg, S., & Ben-Ezra, M. (n.d.). Stereo panorama with a single camera. Proceedings. 1999 IEEE Computer Society Conference on Computer Vision and Pattern Recognition (Cat. No PR00149). doi: 10.1109/cvpr.1999.786969