By Patryk Antkiewicz, backend engineer at Unifa.
Writing tests that check correctness of each piece of code that at the first glance might look obvious and absolutely bug-resistant is a tedious task that most developers don’t like. It might often feel like a waste of time, so it is easy to just ignore it and move on to implement the next feature. However such behavior can backfire at us at some very unexpected time, for example when a seemingly very small and safe code change deployed to production results with a crash in some other, so far perfectly working area of the application. For that reason, keeping high test coverage for source code is one of the key points for ensuring good quality of our software.
One of the goals of Unifa development department for this fiscal year is to introduce a test coverage visualization tool for all our projects, so I decided to take a look at one of the most popular products - Codecov in order to verify if it will work well with Ruby on Rails and if it can be easily integrated with Bitbucket, the CI/CD tool we mainly use.
Most of Unifa backend projects are implemented in Ruby on Rails and developers mainly use simplecov gem to track current test coverage during development. It integrates well with RSpec testing tool and prints the coverage percentage in console after test execution is finished, also generating HTML report which allows to identify the coverage gaps.
While being a convenient tool for daily work of developers, such approach has one disadvantage - it is very difficult to monitor current test coverage by people that don’t work with code on a daily basis, for example managers who just want to have a quick overview of actual status. To verify test coverage of each project, it would be necessary to directly check the build logs in AWS CodeBuild - it might be doable when working with one or two projects, but when the number of repositories increases, with active development in multiple branches, it becomes impossible. Some kind of visualization method becomes necessary to present the coverage reports in an easily accessible and navigable way. And this is where Codecov steps in!
Setting up dummy project
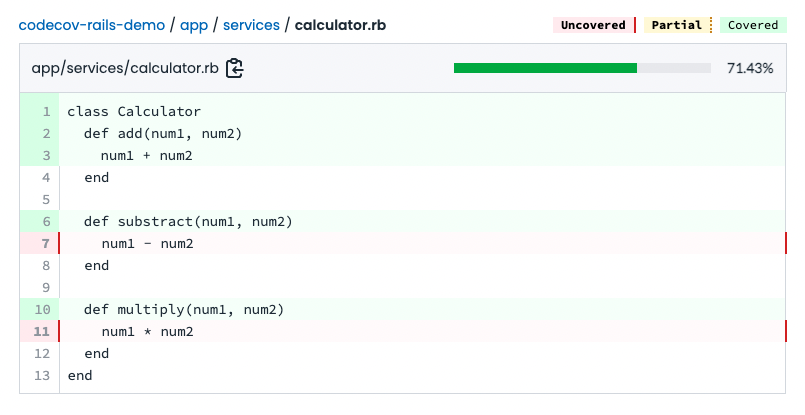
For the purpose of my experiment I created a dummy private repository called codecov-rails-demo on Bitbucket - it is very simple Rails project with a single class named Calculator, containing three functions for arithmetic calculations.
class Calculator
  def add(num1, num2)
    num1 + num2
  end

  def substract(num1, num2)
    num1 - num2
  end

  def multiply(num1, num2)
    num1 * num2
  end
end
I also added rspec test that covers one of the functions.
require 'rails_helper'

RSpec.describe Calculator do
  let(:calc) { described_class.new }

  it 'does addition' do
    expect(calc.add(5, 9)).to be(14)
  end
end
Running rspec locally with simplecov gives the following output - code coverage is 20%.

Integrating with Codecov
Now let's try to integrate our repository with Codecov (https://about.codecov.io/)
Specifying Bitbucket user to be used as Team Bot
Codecov requires designating one Bitbucket user as so called Team Bot - it will use this account to obtain information about repositories, commits and code pipelines. It is recommended to create dedicated user and grant him read permissions for all repos that should be trackable by Codecov - for my simple experiment I used my personal account.
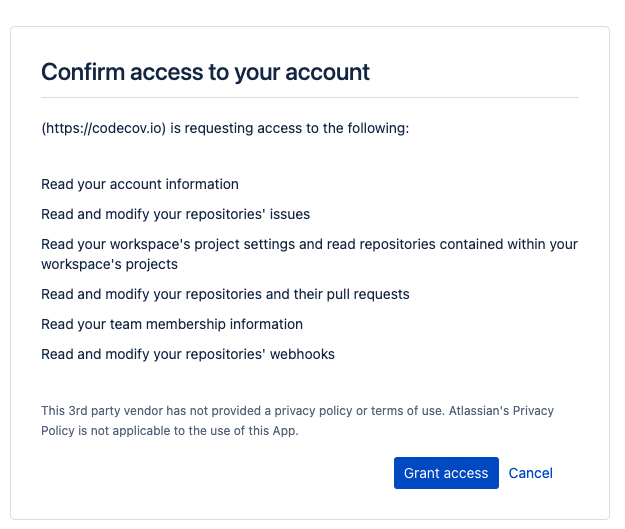
We login to Codecov dashboard using the designated user - login is performed directly using Bitbucket account. We are immediatelly asked to grant Codecov some permissions to read data from our repository.
After that we are redirected to the dashboard. We then go to profile Settings, select Global YAML and paste the following content, specifying selected username as bot:

Global YAML is a general configuration file for various Codecov features including coverage calculation method, default branch name etc. Details can be found here: https://docs.codecov.com/docs/codecov-yaml In this demo I will focus only on specifying bot user, which is a minimal setup. If we want to override global settings for specific repository, we need to create codecov.yml file in the repository root.
Setup Codecov token
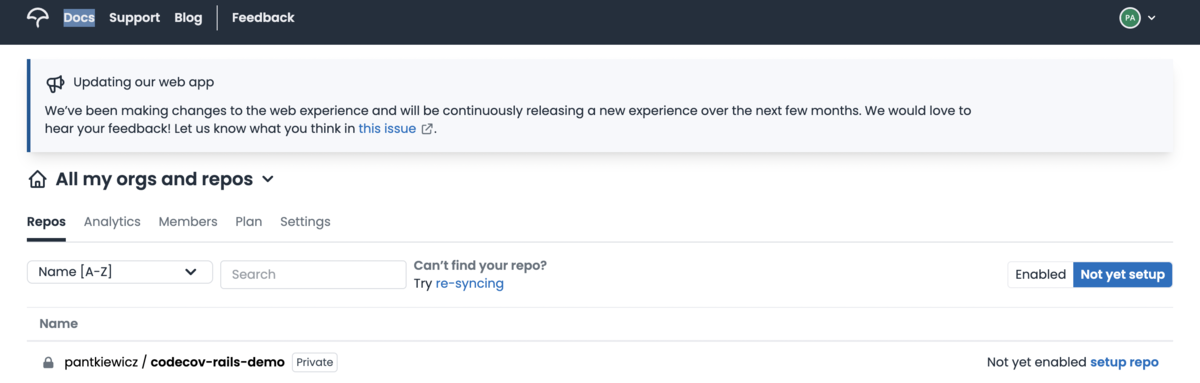
First step is done, now we need to set up integration for specific repositories. Codecov dasboard displays a list of all repositories that our bot account can access - if we didn’t attach them yet to Codecov they will be visible under Not yet setup tab. We go there and click setup repo:
Popup with Codecov Token appears:
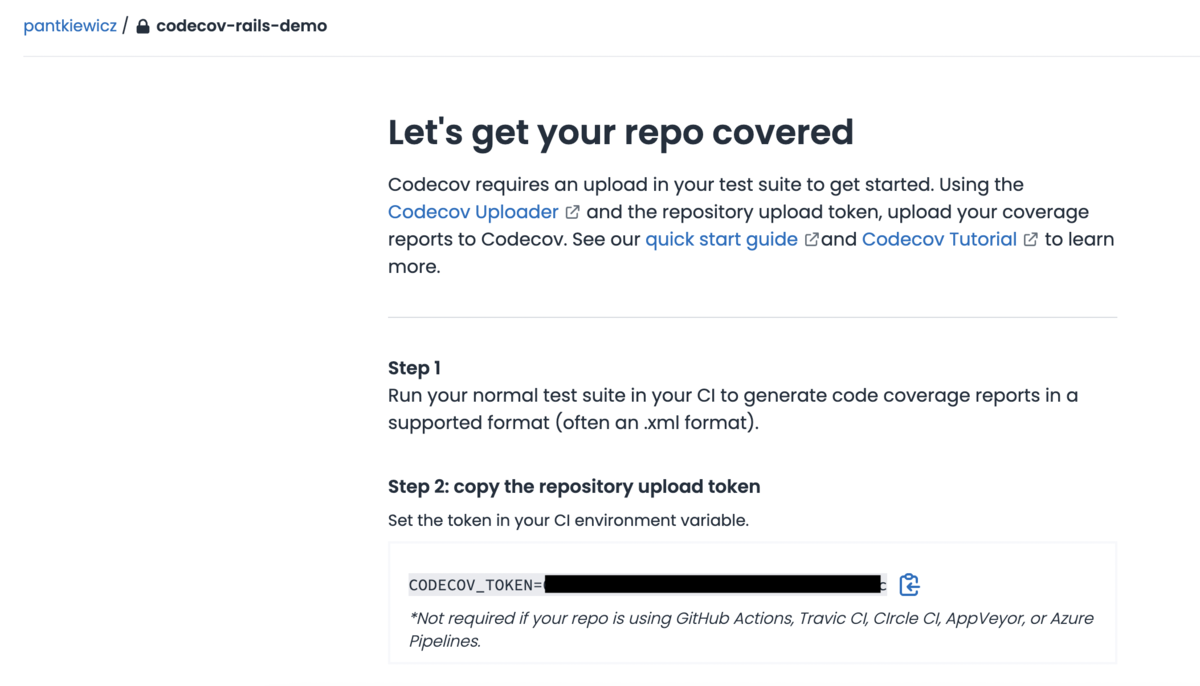
We need to copy the token value and in the side menu of our Bitbucket repository we choose Repository Settings -> Repository variables and save the generated token as CODECOV_TOKEN with Secured checkbox On.

This procedure needs to be done for all our repositories.
Coverage report format configuration
When using simplecov, the coverage reports are created in simplecov-specific HTML format. Such reports are not supported by codecov, so first we need to ensure that our output is in standardized shape - for example Cobertura is a popular format used widely in multiple programming languages, and it is easy to integrate with simplecov.
First, we add the following gem in our Gemfile
gem 'simplecov-cobertura'
Then in spec/rails_helper we add the following lines:
require 'simplecov'
SimpleCov.start 'rails'

require 'rspec/rails'
require 'simplecov-cobertura'
SimpleCov.formatter = SimpleCov::Formatter::CoberturaFormatter
Now whenever we run rspec, a standarized XML report (coverage.xml) will be generated.
Uploading report to Codecov
The final integration step is configuration of Bitbucket pipeline that will execute the tests and upload the coverage report to Codecov. For that purpose we should add the following step in existing bitbucket pipeline after rspec execution:
 - curl -Os https://uploader.codecov.io/latest/linux/codecov
 - chmod +x codecov
 - ./codecov
This code downloads Codecov uploader script and executes it. By default it uses token stored in CODECOV_TOKEN repository variable and sends codecov.xml file to Codecov server. If we want to specify alternative token name, the following command should be used:
./codecov -t ${ENV_NAME}
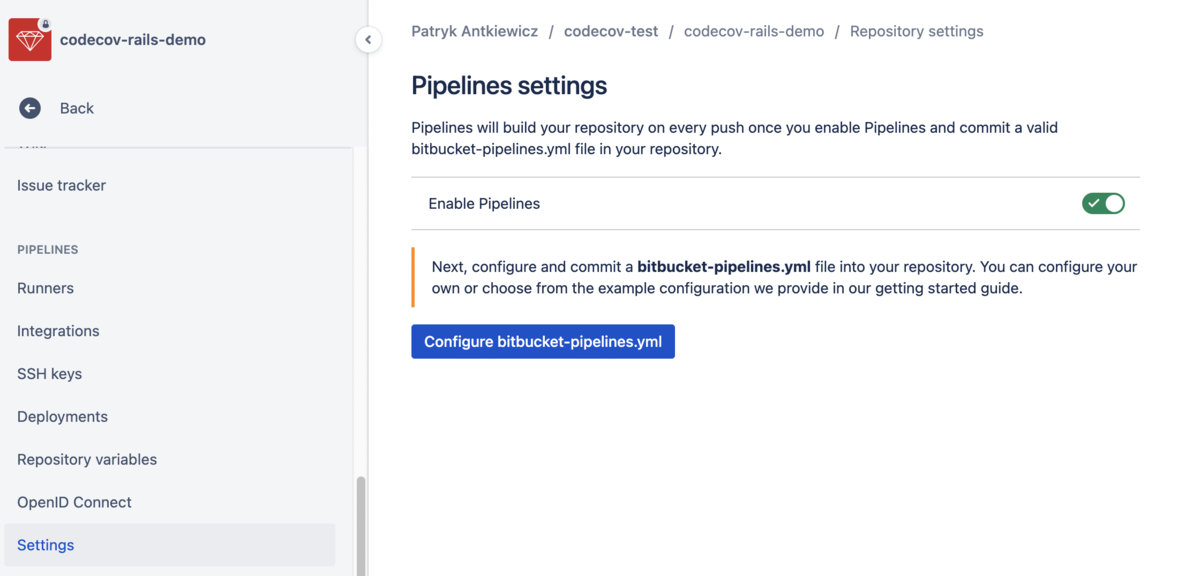
In my case I had no existing bitbucket pipelines so I had to first activate pipelines functionality in my repository settings:
Then I created bitbucket-pipelines.yml file on the root level of my repository with the following content:
image: ruby:2.7.2-buster

pipelines:
 default:
   - step:
       caches:
         - bundler
       script:
         # Install project dependencies
         - bundle install --path vendor/bundle
         # Run CI
         - bundle exec rspec spec/
         - curl -Os https://uploader.codecov.io/latest/linux/codecov
         - chmod +x codecov
         - ./codecov
definitions:
 caches:
   bundler: vendor/bundle
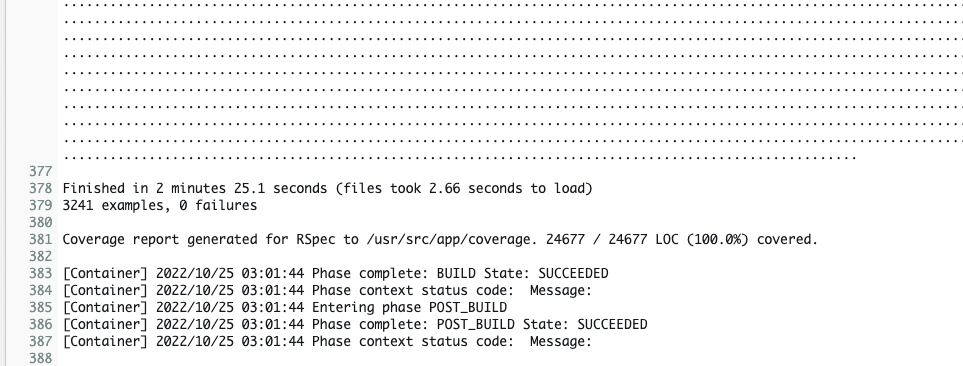
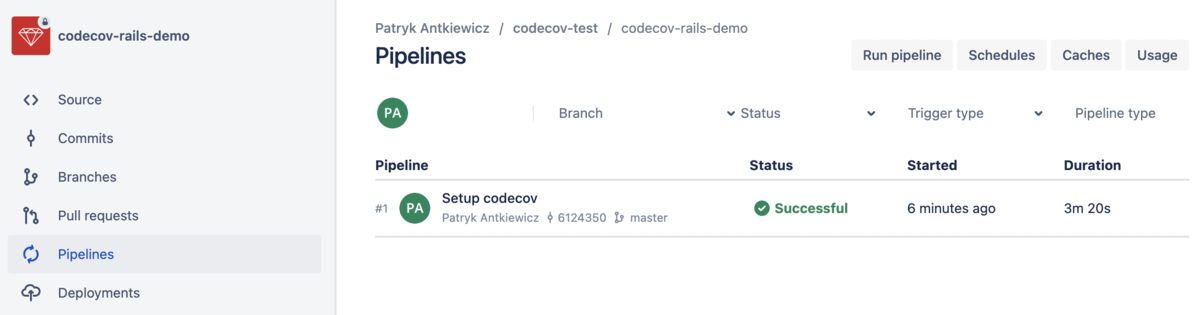
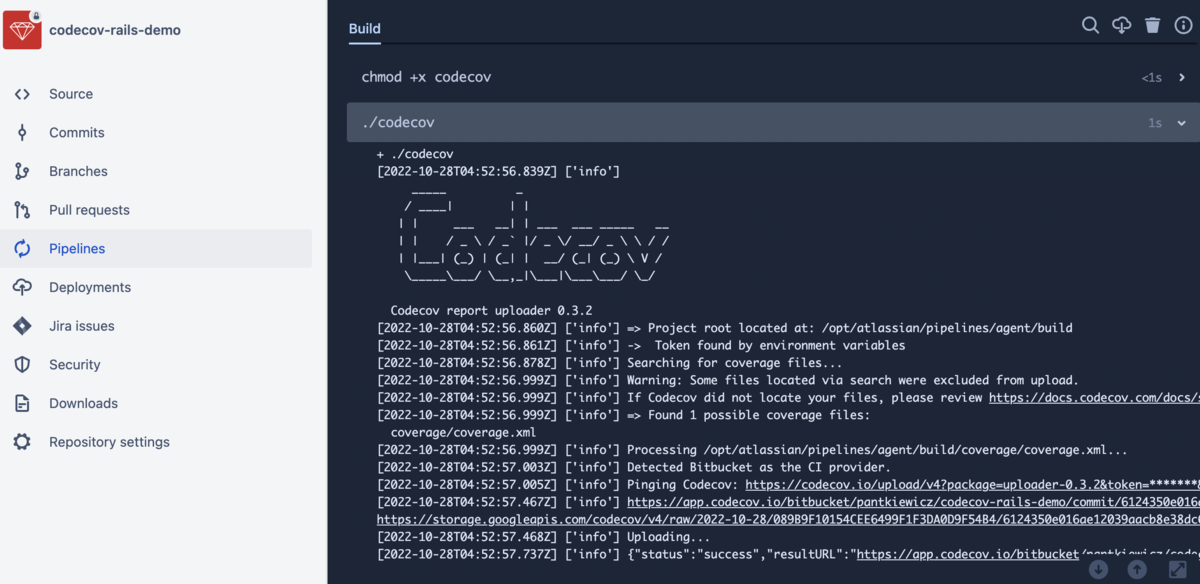
With that the integration setup is finished! After making a commit in our project the Bitbucket Pipeline should start automatically and in logs we should see that the report was successfully uploaded:
Visualizing the results
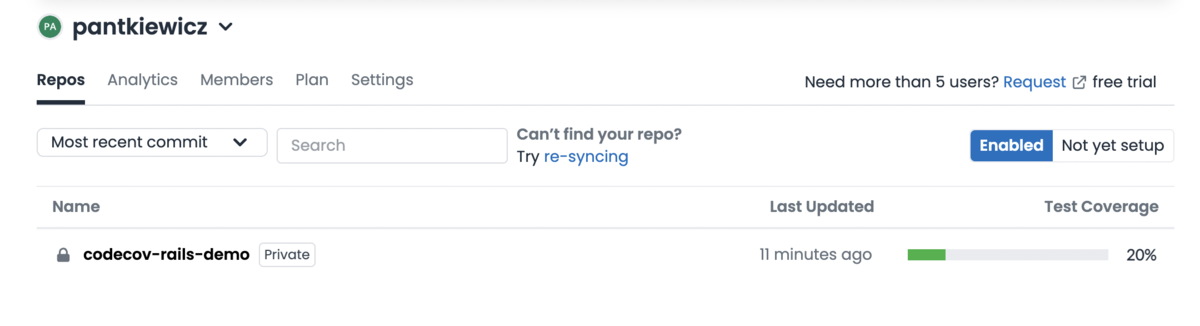
Now let’s check what Codecov has to offer! After logging in to the dashboard we can see current test coverage - if we had multiple repositories connected to Codecov we can see a very quick overview of current status.
After clicking the repository name, we can see various details - check coverage for specific branches, a chart with coverage trend changes (however it seems it is not displayed properly), and coverage of specific files.

By selecting a file we can see its content, with uncovered code fragments marked with red.
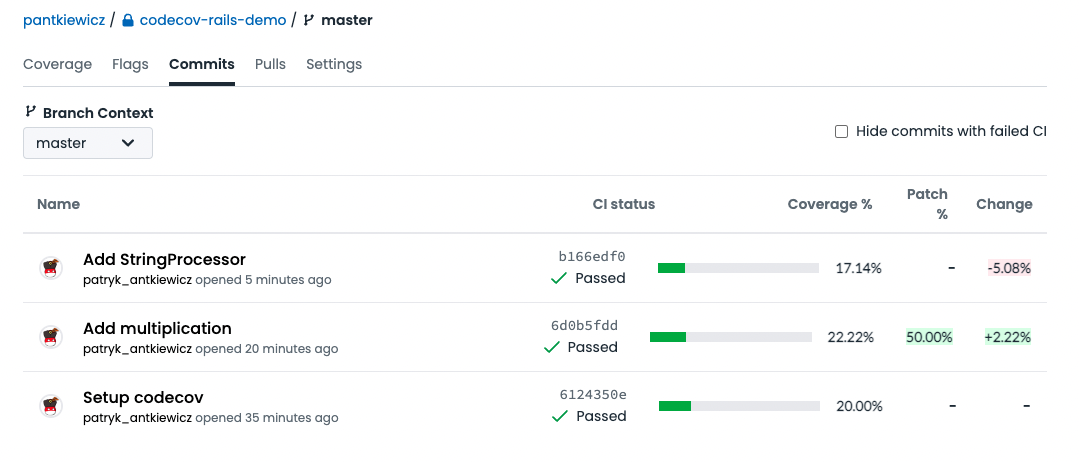
By selecting Commits from top menu we can see how the code coverage changes with each commit. I pushed a new commit with newly added StringProcessor class that has no test coverage - we can see that as a result coverage dropped. Clicking the commit shows details about committed files.
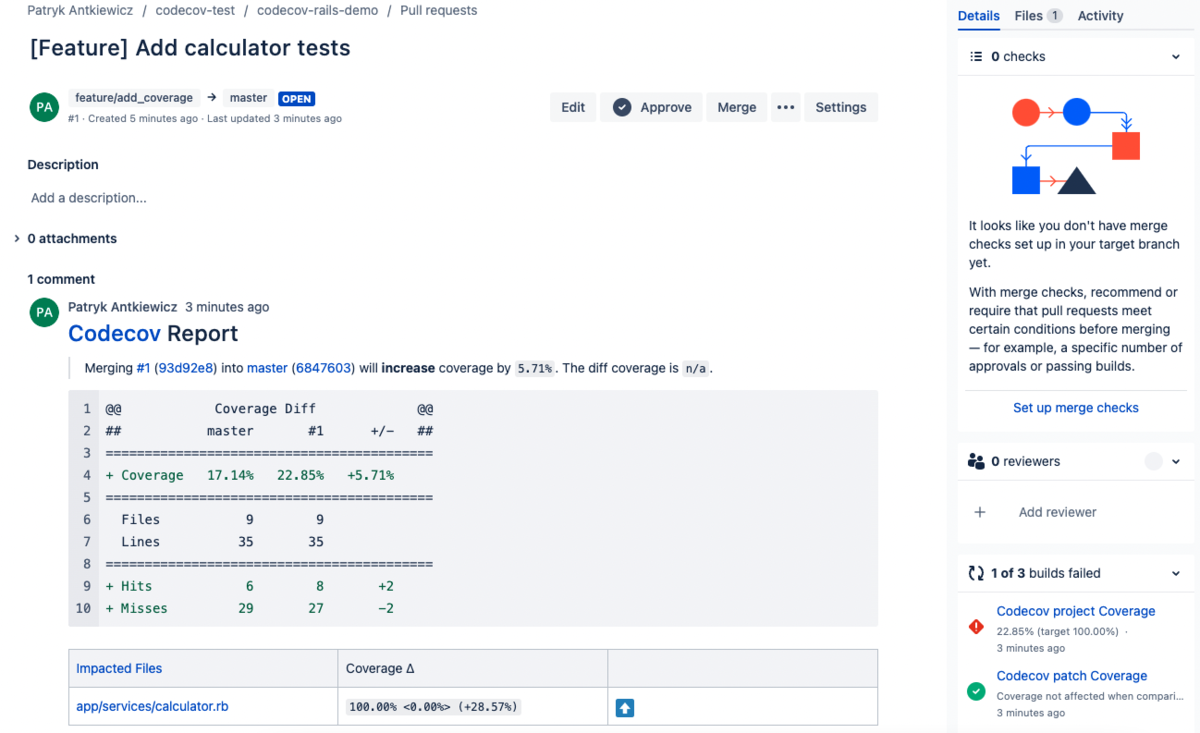
Another useful feature is pull request coverage analysis. I created a feature branch and made a change - added full test coverage for Calculator class. When we open pull request in Bitbucket we can see another useful feature - after the pipeline finishes, Codecov automatically adds comment in the pull request with information about code coverage changes (author of the comment is the user specified as Team Bot in the first step of our configuration)
Then when we go back to our repository details in Codecov and click Pulls tab, we can see a list of open pull requests and the coverage change, similar as in commits tab.

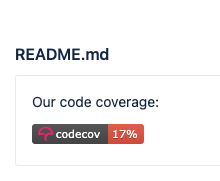
Finally, Codecov offers various HTML/Markdown badges that can be embedded in README, Confluence pages etc. In repository settings we can copy the badge code and paste wherever we need.
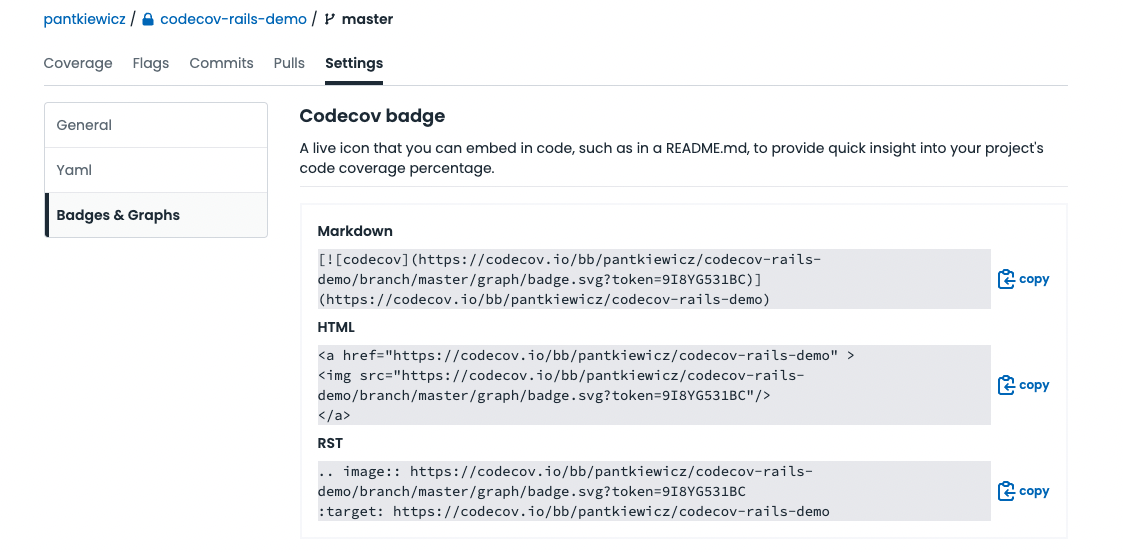
I added markdown badge in README which displays current project test coverage
It was just an overview of the most basic functionalities that Codecov offers, a deeper dive in the documentation will probably allow to find other useful features.
How much does it cost?
Finally let's take a look ad Codecov pricing. There are a few options:
- The Free Basic plan seems good for trying out the application and it handles both public and private repositories. However it comes with several limitations. It supports only 5 users (user is defined as developer who performs commits in the repository), and has a monthly limit of maximum 250 ‘uploads’ (code coverage reports sent to Codecov) for private repositories.
- Pro plan doesn’t have these limitations, but it costs 10$/user/month
- Another option is Enterprise plan, which doesn’t come with fixed price, but can be customized to specific company needs
Summary
Overall, my impression about working with Codecov was very good. It is very easy to setup for Rails + Bitbucket, and integrates well by adding additional info in Pull Request. It is also possible to setup threshold for minimum coverage (if actual coverage is below it, the build will fail) and various other options which I didn’t describe in this article, but the documentation is quite good and easy to understand.
The UI of Codecov dashboard is very easy to use, and presents the coverage changes on various levels (whole repo, pull request, commit, specific file) so I think it fulfills all requirements of a good visualization tool.
As for disadvantages, I experienced a few bugs when playing with Codecov. For a while I was not able to setup new repository in the UI (the page just went blank) but the bug was fixed, and I also noticed that for newly added project it can take some time until the the code coverage is reflected on the Repositories index page. There also seems to be some issue with the Trends chart.
To sum up, I think Codecov is worth considering if we decide to introduce some code coverage visualization tool. Alternative solution to check out might be SonarQube - however its GUI is not as rich as in case of Codecov, and so far I was not able to find a good guideline of how to setup it for Ruby on Rails.
Unifa is actively recruiting, please check our website for details: