By Peter Chen, backend engineer at Unifa.
The PaaS(Platform as a Service) my pet projects used stopped providing free plans from this year. So, recently I've been looking for and trying other alternatives.
Tried to google and got a long result:
- AWS
- Google App Engine
- Azure App Service
- Heroku
- Back4app
- Elastic Beanstalk
- Dokku
- Firebase
- Engine Yard
- Open Shift
- Netlify
- CapRover
- Vercel
- Platform.sh
- Render
- Railway
- Fly.io
- Koyeb
- Northflank
- Qoddi . . .
Well, as many as I imagined. After having looked at some guides, it seems the Fly.io is an easy one which I would try first. At least the deployment flow looks not complicated. (Before you start to try Fly.io please check the pricing page first. Or you will be charged accidently: Fly App Pricing · Fly Docs )
OK, here we go:
Register and sign in:


It supports Github sign in. Nice, we can login directly.

Of course, choose Rails here.
Then we'll see the guide page.

Follow the guide to create a new empty Rails project:
$  Rails new list
$  cd list
The Rails version I'm using:

Now run it up first to see if everything works fine.
$ bin/rails s


Set up configurations before deploying:
First, install the tool - flyctl
For mac users, you can easily install it by Homebrew (other OS please refer to:
Install flyctl · Fly Docs)
$ brew install flyctl
After installed, back to the directory where you created your simple new Rails application and run the command to set up configurations:
$ fly launch
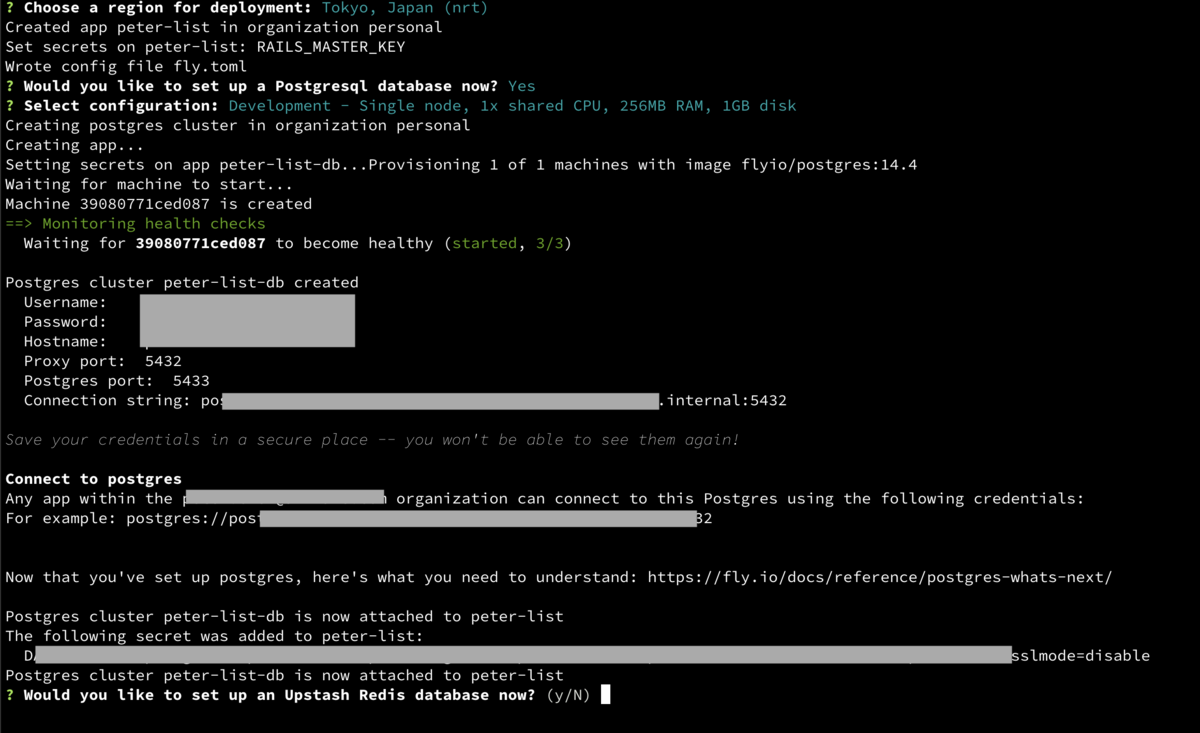
Next prompt is the region to deploy, I choose Tokyo, Japan.
Then you'll see:
would you like to set up a postgresql database now?
Type Y, because we will need to test DB later, too. And please remember to select the default lowest level DB. (or will be charged :P)
Finally, select No for Redis for now. Then you'll see the config file fly.toml & Dockerfile generated automatically. Most configs are inside these 2 files.

(more info regarding the configuration: https://fly.io/docs/reference/configuration/)
Everything is ready now. It’s time to deploy.
$ fly deploy
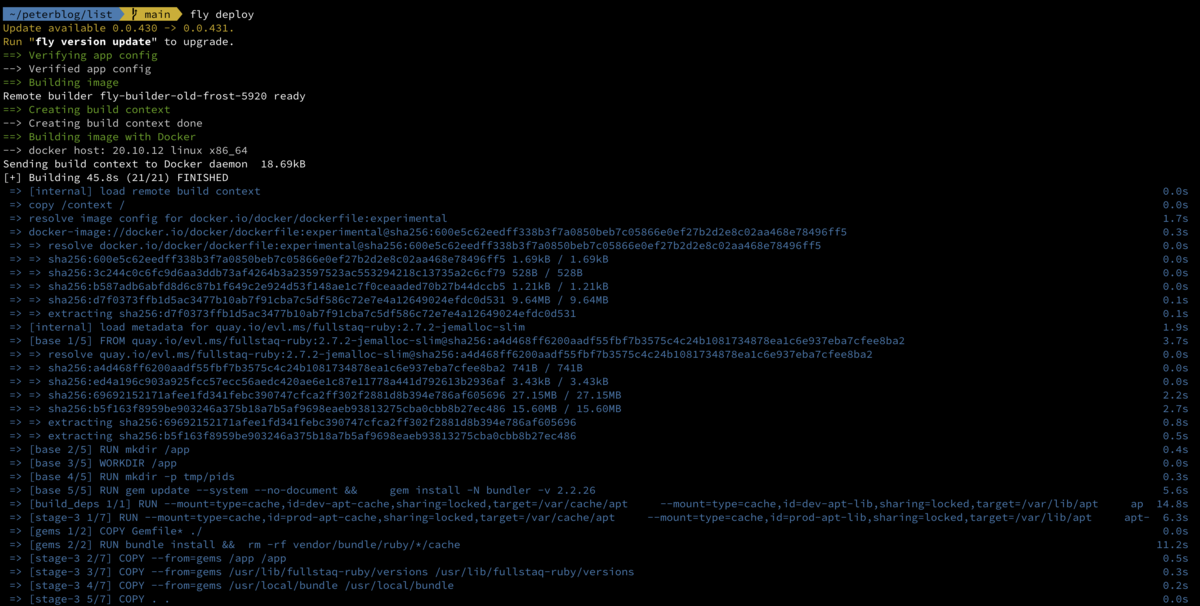

Deployed successfully~! Nice~!
Then, go to the Dashboard page, there's most info of your machines you need.

Next, open the page by command:
$ fly open
It opens the browser and the page you deployed for you.

According to the guide, we don’t need to set up DB by database.yml nor run any migration commands while deploying.
Next, check if our app is using the postgres DB properly. Let’s remove the config/database.yml (to ensure it doesn’t load any config from the yml), and then follow the guide to next step, to generate scaffold:
$ bin/rails generate scaffold Name name
Deploy again (actually, so far haven’t committed & pushed anything yet. That's really convenient.)
$ fly deploy
after it done, let's have a look at the Names index page and try to create some names:

see, it works perfectly without setting up anything for production environment.
finally, let's try the rails console:
$ fly ssh console -C "app/bin/rails console"

also simple & easy.
Summary
If you don't want to spend much time on configuration and set up production environment for you pet projects, Fly.io might be a good choice.
Finally, please remember, it's not a totally free service. If you follow above steps create web applications & DB on Fly.io for practicing, please don't forget to delete all resources you created at the end. Or when it reaches the 160 GB outbound data transfer limit or something, you will be charged. :P
Unifa is actively recruiting, please check our website for details: