ユニファ開発者ブログ

ユニファ株式会社プロダクトデベロップメント本部メンバーによるブログです。

My 2nd Favorite Pi

By Matthew Millar Research Scientist at ユニファ

Purpose:

This blog will be the initial start of an IoT project for computer vision. The final goal will be to locate an individual and to track this individual to see where they are in a room and to tell if they go near a marked area in the room. This will involve; person detection, tracking, and distance measurements from a Raspberry Pi.

B+ is No Longer an OK Grade:

This blog will focus on setting up the raspberry-pi 3B+. This was chosen as the specs were quite good; running a quad-core 64-bit Cortex-A53 processor at 1.4GHz along with dual-band 2.4/5GHz 802.11b/g/n/ac Wi-Fi and Bluetooth 4.2, network connections. This makes it ideal for IoT systems and edge devices. We will not have to add Bluetooth or Wi-Fi adapters to make it connectable in the future which saves time and money (as well as experimentation on it as the network won't work the first round). Pi has an Ethernet port that can serve as an access point but making it Wi-Fi access is a huge bonus as there will be fewer wires that will have to run into the device and thus increases the mobility of the device. One nice addition is that the B+ model ships with a modular compliance certification for the dual-band Wi-Fi which makes it easier to get a product up and running as you will not have to get a full Wi-Fi certification anymore. Another solid point for the B+ is that it comes with 5GHz Wi-Fi which is quickly becoming the IoT standard. The 2.4GHz is starting to become linked to legacy systems.

Pi’s OS:

There are several operating systems for the RPi. Raspbian OS is the which is considered one of the best options for RPi 3 as it is the official OS. It is a very lightweight OS that is perfect for the smaller chip, is specifically designed for the RPI, has a very good community and easy to find resources, and most importantly is Linux based. The second most popular OS for the Pi is Windows 10 IoT Core. This OS is very good at programming. This is a slimmed-down version of Windows 10 and is well suited for quick prototyping connected devices, good for robots and other automated systems, web server like applications are best suited on this OS.

Step one the Setup the edge device.

Let's get the device all connected.
First, we will use an RPi B+ Model which is ideal for IoT edge devices.
f:id:unifa_tech:20191125133629j:plain
Let's see what is all inside this kit.
f:id:unifa_tech:20191125133702j:plain

Now we need an OS.
To install Raspbian OS most recommend NOOBS (New Out Of the Box Software) which is one of the simplest methods to install an OS on the Pi.
First go to https://www.raspberrypi.org/downloads/noobs/ and download NOOBS (not NOOBS Lite).
Next re-format the SD card and chose FAT32 as the format.
Next Unzip the NOOBS zip file and copy and paste all the files in the folder to the SD card.

Then insert the SD card into the RPI.
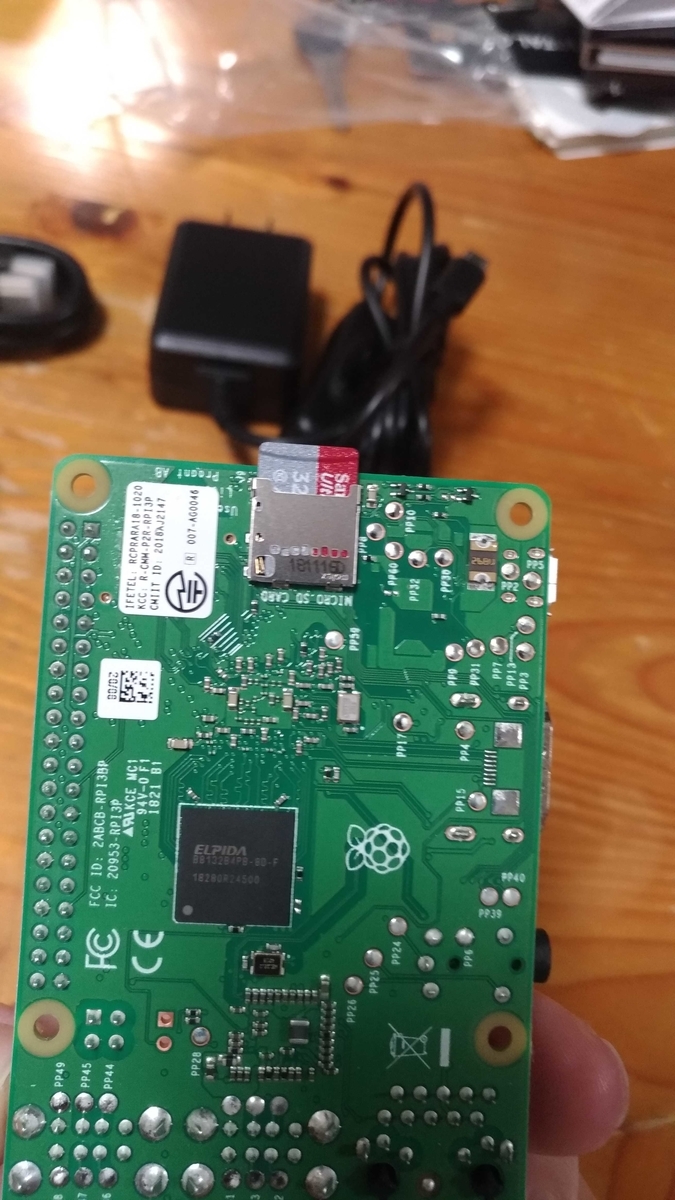
f:id:unifa_tech:20191125134118j:plain

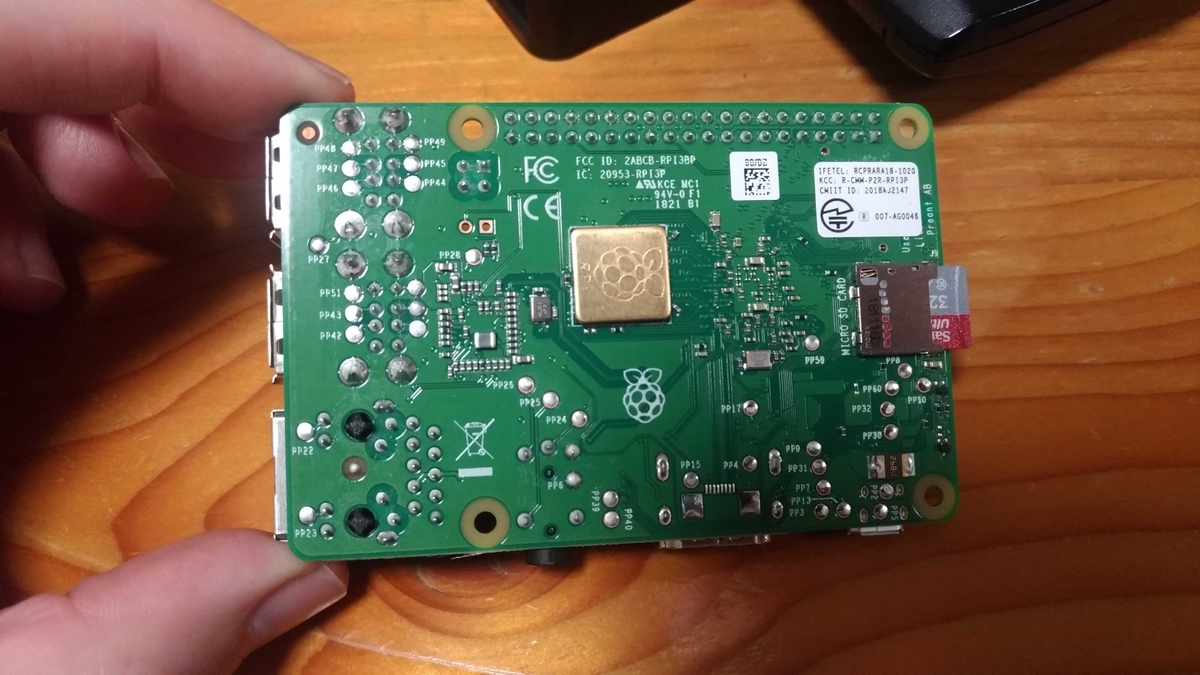
The Pi can get very hot so we need to put heat sinks on the CPU to keep it from overheating and breaking. There are two that should be used at the minimum. One on the front and one on the back.
f:id:unifa_tech:20191125134302j:plain
f:id:unifa_tech:20191125134317j:plain
With these safety measures installed we can move on to the next step. NOTE: if you want to use a lot of network connectivity, I would put a heat sink on that chip as well.

Now we have to assemble it and get it ready to run.
f:id:unifa_tech:20191125134503j:plain

Put the Pi into the provided case for its protection.
f:id:unifa_tech:20191125134544j:plain

Plug in the Mouse and Keyboard
Plug in the HDMI Cable
Then connect the Power Supply.

Now when you turn on the Pi you can install Rasbian OS onto it.
f:id:unifa_tech:20191125134648j:plain
Then Select Raspbian and click install.
f:id:unifa_tech:20191125134709j:plain
f:id:unifa_tech:20191125134734j:plain
This will install the OS onto the Pi. The Pie should now boot with this OS system.

Like all OS systems, there is the initial set up so just follow on onscreen instruction. One note for language support. If you chose English then your keyboard will be an American layout which is kind of a bother when you have a Japanese keyboard.
f:id:unifa_tech:20191125134904j:plain

After this, you should have a setup which now is like a little desktop computer complete with an operating GUI much like that of a Linux UI. Raspbian is a Debian based OS system so it will behave just like any Linux system that is Debian based.

From here you will have to install python 3 and other Deep learning libraries. This can be a bit tricky but will behave very similar to doing it on Linux. With the benefit of using a B+ Model, we do not need an external Wi-Fi adapter as the network chip is already installed on the board. This will save us having to get an Ethernet cable and physically connecting to a LAN. But for now good job.

Oh and for those who are curious my favorite type of pie is pumpkin pie a stable for Christmas.

業務サポートslack botを作ってみた

こんにちは、tjinjinです。9月からユニファでインフラエンジニアとして働いています。この記事はユニファアドベントカレンダーの2日目です。昨日は渡部さんのJIRAの便利Tipsでしたね、JIRA力を上げていきたい…!

この記事では業務サポート用のslack appを作ったのでご紹介します。

作ったもの

とあるサポート業務で特定の外部の方に対して、ファイルのダウンロードをさせたいという要件がありました。セキュリティ的に厳しくない(誰が使ったかを別の仕組みで検知できる)ため、今回はS3のpresigned URLを使って一時的にダウンロードが可能なリンクを生成することにしました。 また、サポートの方が毎回エンジニアに依頼する方式ではつらそうだったので、弊社だとSlackで業務のやりとりをすることが多いのでSlack Appで実装することにしました

業務フローとしては下記のイメージです。

f:id:unifa_tech:20191125174631p:plain

環境周り

環境構成

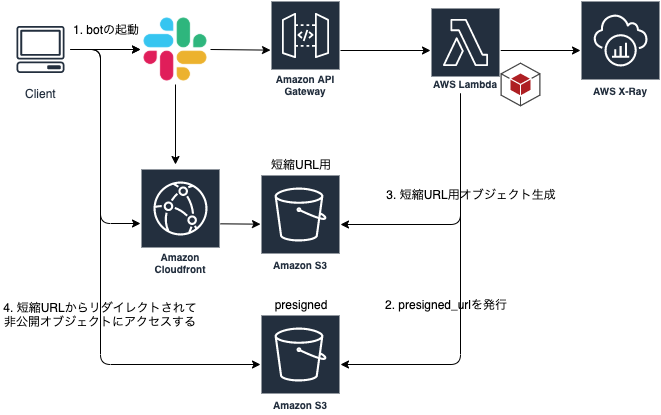
f:id:unifa_tech:20191125174657p:plain

SlackのEvent APIを使ってapp_mentionでbotを起動します。あとはEventに応じてAPI Gateway+lambdaが処理を行うような仕組みです。S3のリダイレクトについては別途後述します。

slack bot

slack botを作成の方法はいくつか考えられますが、以下の点からEvent APIを使った実装にしました

  • lambdaを使って料金を抑えたい
  • 利用頻度はそれほど高くない。必要なときのみ利用する

また、以前使われていたattachmentsは古いとのことだったので、block kitを用いた実装にしました。

Block party - Slack Platform Blog - Medium

block kitの使い方

block kit builderを使ってmockを作ろう

実装するに当たって、block kit builderを使って画面の構成を確認しました。

https://api.slack.com/tools/block-kit-builder

sample templateが用意されているので、どんな風に構成すればいいかがわかり便利です。

サンプルとしてはこんな感じにします。 sample

build kit builderでサンプルができたら、SDKを使ってmodalを起動してみます。

def build_initial_view
{
    "type": "modal",
    "title": {
        "type": "plain_text",
        "text": "My App",
        "emoji": true
    },
    "submit": {
        "type": "plain_text",
        "text": "Submit",
        "emoji": true
    },
    "close": {
        "type": "plain_text",
        "text": "Cancel",
        "emoji": true
    },
    "blocks": [
        {
            "type": "input",
            "block_id": "select_user",
            "element": {
                "type": "static_select",
                "action_id": "selected_user",
                "placeholder": {
                    "type": "plain_text",
                    "text": "Select a user",
                    "emoji": true
                },
                "options": [
                  {
                    "text": {
                        "type": "plain_text",
                        "text": "AAA",
                        "emoji": true
                    },
                    "value": "selected_aaa"
                  },
                  {
                    "text": {
                        "type": "plain_text",
                        "text": "BBB",
                        "emoji": true
                    },
                    "value": "selected_bbb"
                  }
                ]
            },
            "label": {
                "type": "plain_text",
                "text": "Label",
                "emoji": true
            }
        }
    ]
}
end

...

@client.views_open(
  trigger_id: trigger_id,
  view: build_initial_view,
)

今回の場合、mention実行時にtrigger_idが取得できるので、それを使ってviews_openを呼び出しています。これを実行するとmodalが起動します。

modalでSubmitを押したときのinputデータの取得方法

modalでinputされたデータはview_submission payloadとして流れてきます。 https://api.slack.com/reference/interaction-payloads/views

inputデータはview.state.valuesで取得できるのでそれをparseしましょう。

今回のsampleの場合だと、どのユーザをセレクトしたかは、view.state.values.select_user.selected_user.value で取得できます。select_userはblock_id、selected_userはaction_idの値になり、設定されていないとランダムな値になるので設定したほうが楽かと思います。

modalのupdate方法

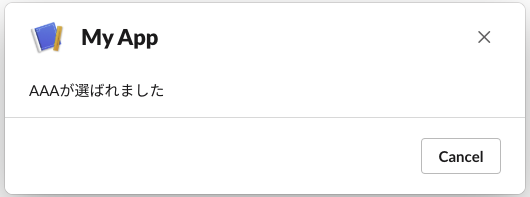
view_submission イベントが送られてきた後に何らかの処理を行い、modalをupdateしたい場合です。イメージとしては、下記のような画面にアップデートする方法です。

f:id:unifa_tech:20191125174832p:plain

view_submissionイベントが送られてきたときのmodalのupdateは、responseとして返す必要があります。 作成時点ではもともとview_submissionイベント内でview.updateをしてましたが、modal上でエラーとなってしまったためのレスポンスとして返却しています。下記のようなJSONを返せばmodalがupdateされます。

{
  "response_action": "update",
  "view": {
    "type": "modal",
    "title": {
      "type": "plain_text",
      "text": "My App",
      "emoji": true
    },
    "close": {
      "type": "plain_text",
      "text": "Cancel",
      "emoji": true
    },
    "blocks": [
      {
        "type": "section",
        "text": {
          "type": "mrkdwn",
          "text": "AAAが選ばれました"
        }
      }
    ]
  }
}

response_actionを指定するのがミソですね。view以下はblock kitを返します。

注意点として、responseは3秒いないかつステータスコード200を返さなければいけないため、重い処理を実行する場合はキューを利用するなどすると良いかと思います。

https://api.slack.com/surfaces/modals/using#modifying

S3リダイレクトを利用した短縮URLの発行

こちらのやり方は昔からある手法のようですが、比較的簡単に短縮URLを作れるので採用しました。

aws.amazon.com

簡単に説明すると、S3のオブジェクトにはMetadataを設定することができますが、その中でWebsite Redirect LocationというKeyに対して、リダイレクトさせたいURLなどをValueに設定することで簡易的なリダイレクトが実装できます。

docs.aws.amazon.com

今回の場合、presigned_urlをWebsite Redirect Locationに設定しています。オブジェクトの中身はなくても問題ないため特に設定していません。

  resp = @s3.put_object(
            bucket: s3_shorten_bucket,
            key: @generate_random,
            website_redirect_location: presigned_url
         )
 

S3オブジェクトのライフサイクル設定も合わせてすることで、古いデータの削除もできるので便利です。

その他はまったこと

補足でハマった部分を記載しておきます。

presigned_urlの有効期間について

presigned_urlの有効期限は最大7日間となっていますが、lambdaに割り当てているIAMロールを使うと7日間経つ前に有効期限が切れる事象が運用テスト中にありました。調べていたところ下記のブログ拝見し、IAMユーザでないと7日間の有効期限のものは作れなさそうということがわかりました。

uchimanajet7.hatenablog.com

長い有効期限を設定する場合は注意したいですね。

今後

よりセキュアな情報へのアクセスが求められるケースがあるので、その場合はリンクへのアクセス状況の把握とアクセス後のリンクの破棄などを実装していく予定です。

明日の記事はMatthewさんの記事です、お楽しみに!

参考リンク

JIRAで、自分宛てメンションのみをSlackに通知する方法

時が経つのは早いもので、本年も残すところあと1ヶ月を切りましたね。

なんと今年は弊社でも有志を募り、アドベントカレンダーを実施することになりました!

改めまして、UniFa Advent Calendar 2019の1日目を担当します、スクラムマスターの渡部です。

今回の記事では、JIRAで自分宛てメンションがあった時のみSlackに通知する方法の1例を解説していきます。

背景

弊社では、開発のプロジェクト管理をJIRAで行っています。

JIRAで何か変更があったときはJira Server Alerts (Legacy)を使ってSlackに通知を飛ばしていましたが、(恐らく)個人宛のメンションのみを通知する設定にはできないので、Slackのチャンネルに大量の通知が溢れていました。 (大量に通知が来ると、集中が途切れたり、見たいものが見つからなかったりと困りますよね…)

メールアドレスにも通知を飛ばすことができるのですが、他の雑多なメールと混ざって重要性が分からなくなりがちなのと、基本的にはSlackベースで仕事をしているので気付くのが遅れたり、確認する場所が2個所になるためすっかり抜け落ちてしまったり…と問題がありましたので、対策を考えてみました。

要は、Slack見てるだけで必要な通知だけに適切に気付けるようにしたかったのです。

設定方法

概要としては、JIRAのメール通知を「自分宛てのメンションのみ」に限定し、Gmailに届いたメールをSlackに飛ばす方法になります。

以下、詳細な設定方法を記載します。

① JIRAの通知設定の変更
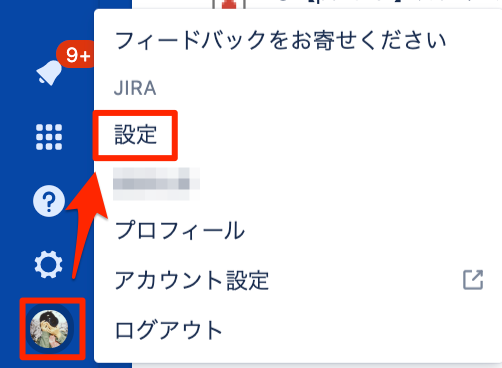
  1. JIRA > 左下のユーザアイコン > 設定 をクリックして「個人設定」へアクセス f:id:unifa_tech:20191125141625p:plain

  2. 「メール通知設定」を「自分がメンションされている」のみにチェックを入れて保存 f:id:unifa_tech:20191125124320p:plain

※他のケースもSlackに通知を飛ばしたい場合は、チェックを入れていただいてOKです。

② Slackに「Email」アプリを追加
  1. Email | Slack App Directory へアクセスしてインストール後、「Slackに追加」クリック f:id:unifa_tech:20191125134555p:plain

  2. 通知したいチャンネルを選択 or 新しくチャンネルを作成し、「メールアドレスインテグレーションの追加」クリック f:id:unifa_tech:20191125141753p:plain

  3. Slack通知用のメールアドレスをコピーし、「インテグレーションの保存」クリック f:id:unifa_tech:20191125134839p:plain

③ Gmailに転送設定・フィルター作成
  1. Gmailの転送先アドレスに、先ほどコピーしたSlack通知用メールアドレスを追加 Gmail のメールを他のアカウントに自動転送する - Gmail ヘルプ

  2. 歯車アイコン > 設定 > フィルタとブロック中のアドレス > 新しいフィルタを作成 クリック

  3. from欄に jira@XXX.atlassian.net(JIRAから通知が届くアドレス)を入力し「フィルタを作成」or「続行」クリック f:id:unifa_tech:20191125135517p:plain

  4. 「次のアドレスに転送する」にチェックを入れてSlack通知用のアドレスを選択し、「フィルタを作成」or「フィルタを更新」クリック f:id:unifa_tech:20191125135618p:plain

※受信BOXをクリーンに保ちたい方は、「受信トレイをスキップ」にチェックを入れていただくのがおすすめです。

④ 確認

以上で設定は完了です。

念の為、JIRAの適当なチケットで自分宛てにメンションして、正常に動作するかを確認しておきましょう。

さいごに

いかがでしたでしょうか?

確認する必要の無い通知をOffにして、見るべきものだけに集中できる状態にすることで、皆さまのJIRAライフが少しでも快適になれば幸いです。

…余談ですが、上記を社内で共有したところ、「それぞれのJIRAプロジェクトから Slack Integration でSlackに通知飛ばすことも出来た気がする!この辺は好みで良いかも。」との情報もありましたので、よければ試してみて自分にあったスタイルを見つけていただければと思います。

それでは引き続き、UniFa Advent Calendar 2019をお楽しみください!

『ユニファでデザイナー向けイベント?!』話題のMeetupに潜入レポ!!

潜入レポ!!は言い過ぎましたが、弊社主催のMeetupに参加しましたのでレポートします。

みなさんこんにちは。ICT開発の柿本です。

最近朝晩がとても寒くなってきましたね。そんな中でも北風がピューピュー吹いて特に気温が下がった11月20日、弊社主催のMeetup「UniFa Developer's Meetup #3」を開催しました!!

テーマは『インハウスデザイナーのキャリア』で、弊社のスーパーデザイナーのコウヘイさんとエースデザイナーのたまちゃんがLTをする!というので勇姿を見届けに参加しました。

当日はゲストスピーカーとして、LAPRAS株式会社の小瀧様、株式会社スペースマーケットの横井様もお迎えしました。(快くお引き受けいただきありがとうございました!!)

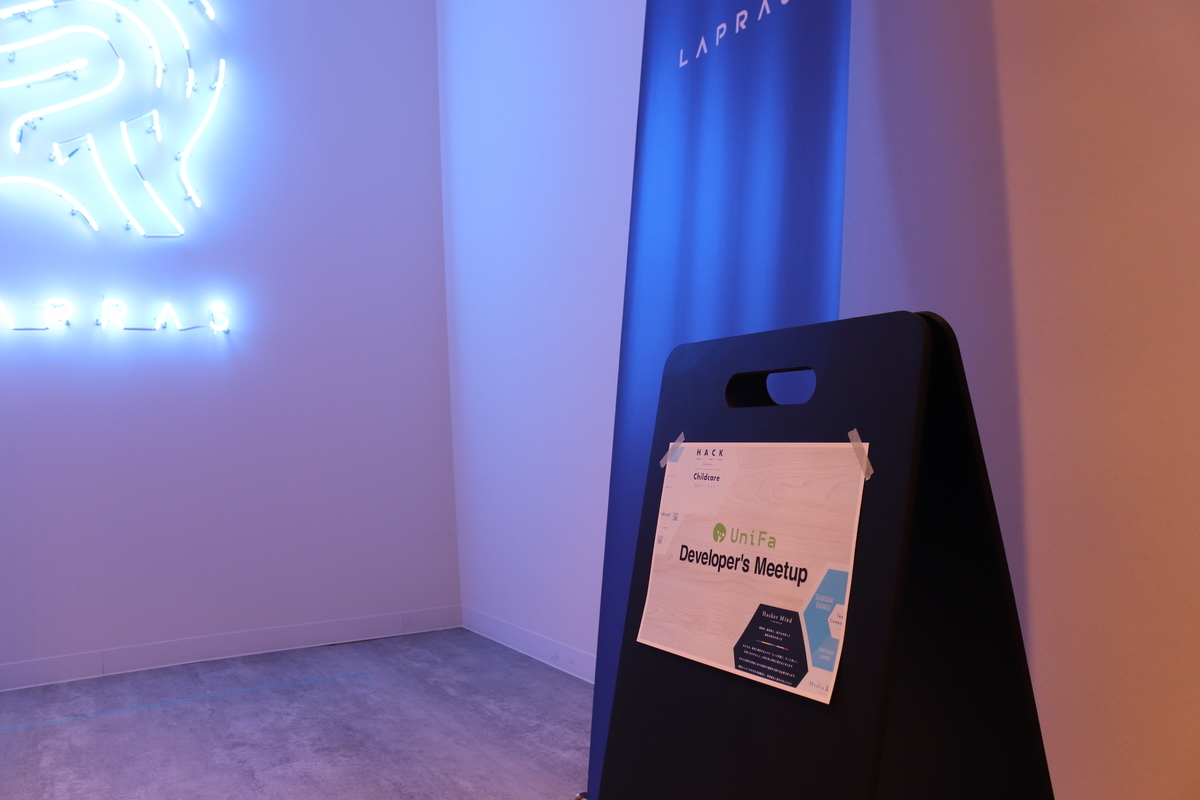
会場は前回NeuroSpaceさんと共催させていただいた「睡眠✕IoT! 」のMeetupと同じく、LAPRAS株式会社様のスペースをお借りしました。

LAPRAS様のオフィスは照明といい壁や床の素材といいとてもオシャレなんですね。弊社も新オフィスになって内装にもこだわったので決して負けてはいないと思うのですが、LAPRASさんのロゴのネオンサインはめちゃくちゃかっこいいです。ユニファのロゴでもこういうネオンサイン欲しいな。

会場エントランス
会場エントランス

当日の進行

19:00 受付開始・ネットワーキング
19:30 オープニング&会社紹介
19:40 LT① 好きなことを突き詰めたらインハウスデザイナーになっていた(ユニファ 技術基盤&デザイン部 デザインチーム 用貝 たまき)
19:50 LT② 事業会社におけるWebデザインのワークフローと実例(ユニファ 技術基盤&デザイン部 デザインチーム 森田 浩平)
20:00 LT③ マネジメント未経験のフリーランスがデザインマネージャーになるまで(株式会社スペースマーケット デザインマネージャー兼部長 横井 麻里乃)
20:10 LT④ 元デザインエンジニアが、今ブランディングとサービスデザインに注力している話(LAPRAS株式会社 Chief Design Officer 小瀧 和正)
20:20 パネルディスカッション
20:40 懇親会
21:30 片付け・解散(22:00 完全撤収)

Lightning Talk

私はデザイナーではないですが、学ぶことはたくさんありましたので、以下簡単にレポートします。

LT① 好きなことを突き詰めたらインハウスデザイナーになっていた

用貝さん(通称:たまちゃん)は今年の5月にユニファにジョインされたのですが、フォトのリニューアルや午睡アプリのUIなど、弊社の主力サービスのデザインに携わっており、その業務内容の紹介や、ユニファに入社するに至った経緯やご自身の考えなどについてお話しされました。

用貝たまきさん
用貝 たまき さん

用貝さんがエンジニア向けのデザインガイドラインとして作成・管理しているツールがあってそれの紹介もしていました。私も以前からその存在は知っていて、WEBコンポーネントを作る時にどうコーディングすれば良いかがわかりやすくなっていて、「フォトチームのあのツールいいな〜」と思っていました。ぜひICTチームにも欲しいので作ってください!

最後に用貝さんの考えるインハウスデザイナーの働き方として、「境目をカバーする」というお話をされていました。確かに弊社のように比較的小さい組織でも、いろんな職種のメンバーで仕事をしているとコミュニケーションロスなどが発生するので、その境目をカバーする働き方はとても大事だと思いました。

LT② 事業会社におけるWebデザインのワークフローと実例

森田さん(通称:コウヘイさん)は去年の11月にユニファにジョインされましたが、それまでのキャリアも長く、コーディングもガリガリできまくるベテランデザイナーです。

森田浩平さん
森田 浩平 さん

受託のデザイナーとインハウスデザイナーの働き方や期待値の違いや、ユニファでのプロダクト制作の流れを実例を交えてお話しされました。

弊社のコーポレートサイトが9月にリニューアルされ、「なんだか海外のサイトっぽくてオシャレじゃん」と思っていたのですが、そのサイトリニューアルプロジェクトの裏話などについて聞かせてもらいました。 印象的だったのが、「今のデザインチームが、イラストレーター、カメラマンなど、デザイン以外をそもそもできるチームだったからこそ成功した」と話していて、チームを誇りに思う森田さんがかっこよかったです。

インハウスデザイナーのキャリアパスについて、「仕事に線引きしない」と話をしていました。仕事にガンガン線引きするタイプの私には耳が痛かったですが、「そうすることで信頼を得て必要とされる存在になる」とのことだったので頑張ってみようと思いました。

LT③ マネジメント未経験のフリーランスがデザインマネージャーになるまで

株式会社スペースマーケットのデザインマネージャー兼部長である横井さんは、今のポジションに着くまでのキャリアについてお話ししていただきました。

横井麻里乃さん
横井 麻里乃 さん

スペースマーケットでは、デザイナーのキャリアパスはリードデザイナーとマネージャーに別れており、それぞれデザイン・UXの責任者となる、メンバー育成や統括などして組織に影響力をもつ、といったことが期待されているとのことです。ユニファもマネージャーとスペシャリストの2つに別れており、基本的な考え方は同じだなと思いました。

インハウスデザイナーのキャリアについては「越境」がキーワードでした。「UXとは組織横断で取り組むべきものであり、そのためには全部署を横串でまとめる調整能力や境界を超える力が求められる」とのこと。用貝さんや森田さんと近いメッセージに思いましたが、より「引っ張って行かなきゃダメ!!」というメッセージを感じました。

LT④ 元デザインエンジニアが、今ブランディングとサービスデザインに注力している話

冒頭でもご紹介したオシャレなオフィス空間を創出しているLAPRAS株式会社のCDO・小瀧さんには、「キャリアには目的が大事」というまた一歩、人生を俯瞰した視点でのお話をしていただきました。

小瀧和正さん
小瀧 和正 さん

小瀧さんの生涯の目的は「美しいものを作りたい」とのことで、デザイナーの鑑のような目的をお持ちだと思いました。ちなみに私の生涯の目的はまだ見つけていません!見つかる日が来るのだろうか。。

小瀧さんはキャリアにおいて、デザインやプロダクト制作など「何を作りたいか?それはなぜか?」という問いを大事にしてキャリアの選択をしてきて、それが結果的に「美しいものを作りたい」という思いを太くしてきた、とお話しされていました。

インハウスデザイナーのキャリアとしては、「会社のミッションに対してデザイナーは何ができるのか?」と考えることが大事。 インハウスで働くこと、クライアントワークをすること、それぞれに利点はあるが、どちらにしても「目的を明確にし、新しいHOWを身につけることでデザイナーのキャリアをアップしていくことができる」とのことでした。

とりあえず私は自分の生涯の目的を見つけるところから始めようと思いました。

パネルディスカッション

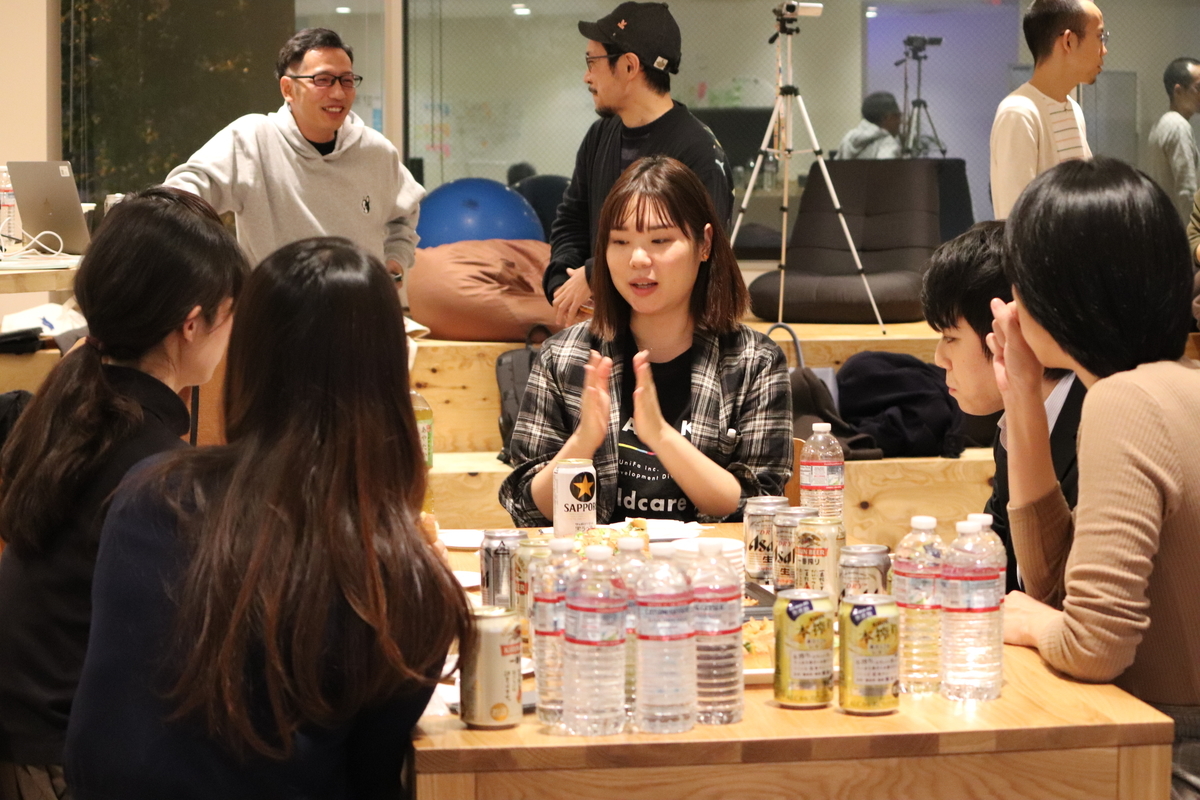
乾杯の後のパネルディスカッションは、予定では20分でしたが実際には30分以上、スピーカーの方々のざっくばらんなトークを聞くことができました。

乾杯 & パネルディスカッション
乾杯 & パネルディスカッション

用貝さんの制作したデザインガイドラインについての質問や横井さんの会社でのデザイナー以外の巻き込み方などについて質問がありました。

スピーカーの4名ともマネージメントに関わる話が多かったため、「スペシャリストとして目指すべきものは?」という質問があり、 横井さんの「スペシャリストでもインハウスでは組織横断のまとめあげが大事」や、小瀧さんの「UXは自分達だけで完結しない。周囲の協力と共感が大事。」といったお話が印象的でした。

会場からの「デザイン目線から経営目線に入るには何が必要?」という質問については、森田さんの「デザイナーはコーポレートサイト制作などCEOと仕事をすることが多く、経営者の戦略や思想を肌で感じられるので、そういうチャンスを活かすべき」というお話や、CDOとしてCEOと常日頃から仕事をされている小瀧さんからは「デザイナーとしての想像力を活かして、ストーリー戦略を描くこともできる。」や、横井さんの「プロダクトの5年先・10年先、日本がどうなっているか?などを意識できると良い。」という、また一段と高い目線でのお話を聞くことができました。

懇親会

懇親会では、参加者のみなさんとスピーカーを交えての交流の場となりました。 スピーカーの方のキャリアやその考え方についての質問や実際の会社での働き方などについての会話が行われ、とても有意義な時間になったと思います。

懇親会

感想

弊社ではプロダクトのフロントの実装自体はエンジニアが行っており、WEB画面の実装はサーバーサイドエンジニアが担当しています。私自身のこれまでのキャリアでもそうでした。ただし、サーバーサイドエンジニアがフロントの実装をすると、一生懸命頑張ったわりになんかダサい、という哀しいUIが出来上がりますよね。(私だけではないはず!)

そんな時にデザイナーが作ったデザインを目指して実装すると、完成品が明確なので作業効率も良いし、結果的にいけてるものができるので作業も捗ります。つまり良いプロダクトの制作にはデザイナーはとても重要です! 今日のスピーカーのお話を聞いてより良いデザイナーが増え、もっと良い製品が世の中に増えれば良いなと思いました。

また、「越境」や「境目をカバーする」といった働き方はデザイナーでなくても活かせることであり、職種の線引きが(良くも悪くも)明確でないスタートアップならではの働き方なので、エンジニアの私も取り入れて行こうと思いました。

何はともあれ、私は生涯の目的を見つけます。

最後に

今回貴重なお話をしてくださったスピーカーのみなさま、会場を貸してくださったLAPRAS株式会社様、会場に足を運んでくださった参加者の皆様、イベントの開催に向けご協力いただいた人事・広報のみなさま、誠にありがとうございました。

スピーカーの皆様
スピーカーの皆様

また定期的にMeetupを開催させていただきますので、弊社に興味のある方、サンドイッチをつまみにビールを飲みたい方、是非ご参加ください!

ユニファでは、一緒に「保育をハックする」エンジニアを募集中です!生涯の目的を探すお供をしてくれる人も募集中です。

unifa-e.com

MAG V

By Matthew Millar R&D Scientist at ユニファ

Purpose:

This is part V of the MAG (Multi-Model Attribute Generator) paper I am working on. This post will look at locating bags, handbags, and suitcases. This will be a bit different than the last couple of posts as it will be an object detection based approach.
If you missed some of the other parts of this series take a look here:
Multi-Model Attribute Generator - ユニファ開発者ブログ
MAG part II - ユニファ開発者ブログ
MAG Part III Upper Body - ユニファ開発者ブログ
MAG Part IV Color - ユニファ開発者ブログ

Lessons Learned:

Well, there are no real lessons that I learned from the last post as this is a different type of model, a detector and not a classifier. Even though it will be used as a classifier in the end, right now all I care about is if the person is or is not carrying a backpack, a handbag, or a suitcase. But we will be finetuning a pre-trained classifier called ImageAi (https://imageai.readthedocs.io/en/latest/) This is a detector AI system that is easy to use, install and quickly make predictions with no or very little changes to the training.

Retraining the system:

I won’t go into a lot of detail about how to retrain the system as it is covered very well in the documentation, so I will give a quick overview of the process here. The first thing that must be done is setting up your dataset annotations using a PascalVOC format that is used by YOLO3. This can be done by; getting the objects you want to detect, collecting the images needed (200+ is the recommendation per class/object), create a main folder for each object with a train and validation folder inside each main object folder. The train and test split should be the standard 80/20% split. There should be annotations for each image in each train/validation folder.
Now, the code is a lot easier than other YOLO3 retainers as most of the boilerplate code and management are done for you.

from imageai.Detection.Custom import DetectionModelTrainer
trainer = DetectionModelTrainer()
trainer.setModelTypeAsYOLOv3()
trainer.setDataDirectory(data_directory="Bags")
trainer.setTrainConfig(object_names_array=["backpacks", “handbags”, “suitcases”], batch_size=4, num_experiments=200, train_from_pretrained_model="pretrained-yolov3.h5")
trainer.trainModel()

This retraining is not mandatory as the three objects that I wanted to test were already included in the pre-trained model. However, by retraining the YOLO3 weights, it will better detect the objects that are specified in the Market1501 dataset instead of missing some. This does take some time to collect all the data point but it is worth the effort as it can increase the accuracy for a specific dataset by 10 to 30% due to the type and quality of data that is being used.

Do You Have a Bag?

Now let’s see how to use the retrained model for prediction/detection of a bag or not. There are two ways that I use this; one with Keras and one with OpenCV. I personally prefer doing it with Keras as you won't have to have an output image to the detector. If you put an image indirectly to the detector (which is possible) you will have to give an output file. But using an array-like reading in an image using Keras or OpenCV will change it into an array and you will not need to have an output file.
So first let’s import everything we need to use;

import os
from imageai.Detection import ObjectDetection
from keras.preprocessing import image
import cv2
import matplotlib.pyplot as plt
import numpy as np

Next, let’s create the detector to use

# Set up detector
detector = ObjectDetection()
use_yolo = True
if use_yolo:
    detector.setModelTypeAsYOLOv3()
    detector.setModelPath("yolo.h5")
else:
    detector.setModelTypeAsRetinaNet()
    detector.setModelPath("resnet50_coco_best_v2.0.1.h5")

# Set up custom detector to look at only bags and nothing else the object detector is trained on
custom = detector.CustomObjects(backpack=True, handbag=True,suitcase=True)
detector.loadModel()

Note we have a custom set of rules for the detector which limits what it returns to only what we want. In this case, our three classes backpack, handbags, and suitcases.
Next, we will run the image through the detector which will look for the above classes:

# Accpets raw images
# detections = detector.detectCustomObjectsFromImage(custom_objects=custom,
#                                                    input_image= test_img,
#                                                    output_image_path="image3new-custom.jpg",
#                                                    minimum_percentage_probability=60)

img = image.load_img(test_img)
img = image.img_to_array(img)
detections_keras = detector.detectCustomObjectsFromImage(custom_objects=custom,
                                                   input_image= img,
                                                   input_type='array',
                                                   minimum_percentage_probability=60)

Note the two differences between using an array and a raw image.
Then we store the results and can get the name, bounding box points, and percentage for each object. We can see a function for the whole thing.

def process_img_keras(img_path, detector):
    img = image.load_img(img_path)
    img = image.img_to_array(img)
    detection =  detector.detectCustomObjectsFromImage(custom_objects=custom,
                                                   input_image= img,
                                                   input_type='array',
                                                   minimum_percentage_probability=70)
    
    test_results = []
    for eachObject in detection:
        test_results.append([img_path, eachObject["name"], eachObject["box_points"], eachObject["percentage_probability"]])
    
    return test_results

Now display the results with this code.

def print_results(img_path, result):
    if not result:
        cv_img = cv2.imread((img_path))
        plt.axis("off")
        plt.imshow(cv2.cvtColor(cv_img, cv2.COLOR_BGR2RGB))
        plt.show()
    else:
        name = result[0][0]
        x,y,x2,y2 = result[0][2]
        percent = result[0][3]

        cv_img = cv2.imread((img_path))
        cv_img = cv2.rectangle(cv_img, (x, y), (x2, y2), (0,255,0), 1)

        plt.axis("off")
        plt.imshow(cv2.cvtColor(cv_img, cv2.COLOR_BGR2RGB))
        plt.show()


Looking at the results the output is quite good but has some issues with very hard images where the color is too close to the shirt or clothing so it cannot see the bag. But it did not get the lady with a chair wrong so that is a good thing.

Bag Bag Bag No Bag No Bag
f:id:unifa_tech:20191115163822p:plain f:id:unifa_tech:20191115163841p:plain f:id:unifa_tech:20191115163854p:plain f:id:unifa_tech:20191115163905p:plain f:id:unifa_tech:20191115163914p:plain

Conclusion:

The results were as expected from this as object detection once done correctly is quite hard to mess up. Therefore, it is always advisable to use a pre-trained version over doing it yourself. You can make it from scratch depending on your task, however, it will never be as robust as these models that have been trained on over 1000 different classes and millions of images. So, this is a successful method for finding bags in an image that was quicker and possibly more accurate than building a classifier for each type of bag and people without bags. We would need a lot more data than what we used and would have to annotate a lot more than just 200 images per class.

What’s Next:

This concludes the MAG code along part of the MAG system. I will now start to work on improving the accuracy of everything and then tying them together in a final model.
For now, we will start to turn our attention to IoT and Computer Vision on Edge devices. We will start to work with Raspberry Pi and Google Coral in our next set of blog post All through XMAS!

RubyWorld Conference 2019

By Robin Dickson, software engineer at UniFa.

The RubyWorld Conference 2019 was held on November 7th and 8th in Matsue, Japan. UniFa joined as a sponsor and had a chance to show the Lookmee Nap Check service (ルクミー午睡チェック), which uses technology to assist childcare staff when babies are taking naps.

f:id:unifa_tech:20191113163026j:plainf:id:unifa_tech:20191113165905j:plain

At the UniFa booth we showed various people, from engineers to business people to high school students Lookmee Nap Check. The response was very positive, they enjoyed trying the technology and seeing how it can be applied to nursery schools. It's valuable as a developer to see people use software for the first time and see their reaction to the concept and user experience.

The conference was also a great opportunity to meet people from the Ruby world, and find out how they are using Ruby. I was interested to learn about how Ruby is being used to teach programming, including a game where learners can use blocks to create Ruby code.

f:id:unifa_tech:20191113165240j:plainf:id:unifa_tech:20191114131028j:plain

Sessions

The first keynote was by Yukihro Matzumoto (Matz), the creator of the Ruby programming language, who talked about how Ruby was created and gave insights into its future. He emphasized the importance of community and focused on four points that have helped to build Ruby into the 11th most popular programming language in the World (in the TIOBE index).

These were:

  1. Motivation - Creating a programming language gives you ultimate freedom. Motivation must be maintained over the long run.
  2. Define Target Audience - Himself and friends like himself
  3. Community - Open software, open to contributions
  4. Goal Seeking - Concrete goals - For example Ruby 3 should be 3x faster than Ruby 2

He gave a first look at the goals of Ruby 4, which he decided only the recently, and these were for Ruby to be faster and smarter. He clarified the meaning of smarter in the Q&A to be features such as type checking, better error messages and better editor integration.

Matz's talk can be watched here. All of the sessions were available in Japanese and English and the recording is in Japanese.

f:id:unifa_tech:20191114131128j:plain
Yukihiro Matzumoto's Keynote

The second day began with a keynote from Nadia Odunayo who gave a talk called The Case of the Missing Method which explained concepts such as singleton classes, DSLs and debugging through the format of a mystery story. The way technical concepts were introduced through a story was especially engaging and included interesting parts of Ruby such as ObjectSpace.

Another highlight was the talk on Asynchronus Ruby by Samuel Williams. He compared different approaches to asynchronus programming and then focussed on the Ruby async gem implementation.

UniFa CTO Hiroaki Akanuma gave a presentation about on the concept of a smart nursery, which resulted in many people visiting the booth to find out more information. He showed how technology can be used to improve nurseries for both parents and teachers. UniFa's vision of a smart nursery (スマート保育園) can be seen in the video below.

www.youtube.com

The Ruby Prize

The Ruby prize was awarded at the end of the day and went to Sakura Itoyanagi for his contributions including to RDoc and IRB. He gave a presentation in which he talked of the challenges he faced and drew comparisons to his experiences when mountain climbing.

He explained that in adventurous acts:

  • Common sense doesn't apply
  • You must push forward in the face of adversity
  • You may suffer severe setbacks

He explained how in programming, working on Ruby is also an adventure, and these same 3 points apply. Because Ruby is designed to be easy for users, it is more difficult for machines to understand. Learning that the reason using Ruby is so nice to use for developers is that the Ruby committers take on incredibly difficult challenges made me feel very grateful for the hard work of the Ruby committers.

Summary

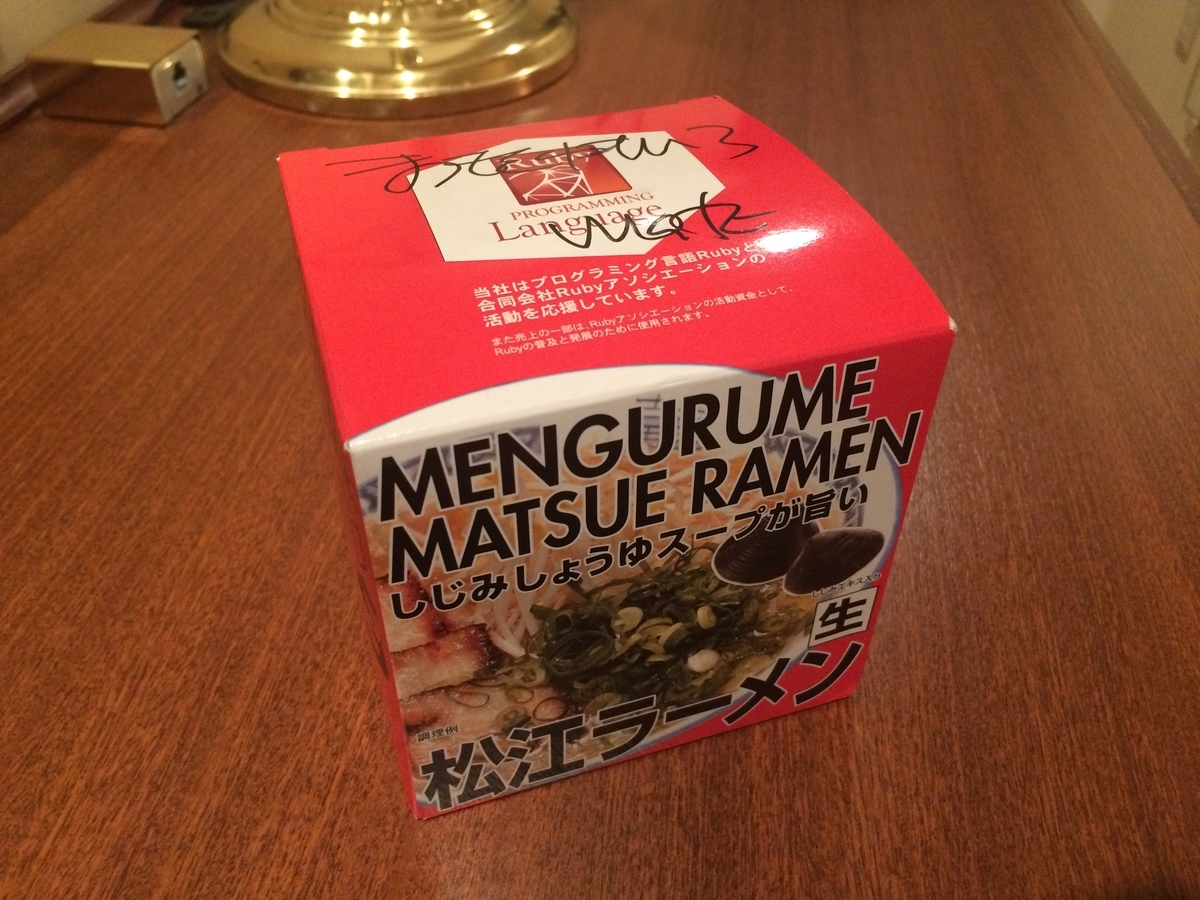
The RubyWorld Conference was a great opportunity to learn about Ruby, and meet the wider community including businesses and educators. It was valuable to view software development from these different perspectives. I recommend attending if you have the chance, you may even win an interesting souvenier, such as some ramen signed by Matz!

f:id:unifa_tech:20191115184830j:plain

JUMP問題

こんにちは、プロダクト開発部のちょうです。前回から結構長い時間経ってましたので、すこし別のトピックにしようと思います。紹介なしで短い時間でできることの一つは多分アルゴリズム問題でしょう。今回こういう問題を解いてみたいと思います。

入力:整数の配列、例えば [3, 1, 0, 4]。 あなたは最初に最初の要素の場所に居て、それとその要素の値によってあなたが最大どれぐらいの距離でJUMPできるかが決められる(要素の値はすべて0以上)。例えば [3, 1, 0, 4] の最初の要素が 3 なので、あなたが最大3ステップJUMPできる。もちろん、1ステップと2ステップもできる。 いま、問題は入力された配列で最後の要素までJUMPできるかどうかを出力してください。出力は truefalse のどちらでよい。例えば [3, 1, 0, 4] の最初の要素 3 から3ステップJUMPすれば最後の要素4までJUMPできる。また、[2, 1, 0, 4] のような配列では、最初の要素 2 からステップ1でもステップ2でも、次の要素から最後の要素までJUMPできない。

解答の関数は以下のようになる(言語はJava、入力と出力の仕方は考慮しなくてもいい)。

class Solution {
    public boolean canJump(int[] nums){
    }
}

この問題を見て最初に考えられるのは、いま居る位置の要素の値ですべての可能性を確認します。ここで再帰を使うと分かりやすいでしょう。

class Solution {
    public boolean canJump(int[] nums){
        int n = nums.length;
        if(n == 0) {
            return false;
        }
        if(n == 1) {
            return true;
        }
        return doCanJump(nums, n, 0);
    }

    private boolean doCanJump(int[] nums, int n, int i) {
        int availableSteps = nums[i];
        if(i + availableSteps >= n - 1) {
            return true;
        }
        for(int j = 1; j <= availableSteps; j++) {
            if(doCanJump(nums, n, i + j)) {
                return true;
            }
        }
        return false;
    }
}

関数 canJump では、まず配列をチェックします。空の場合はそもそもJUMPできないので、結果は false 。それと、要素数は1の場合、この唯一の要素の値はどうであれ、最初でも最後の要素なので、もちろんJUMPできます。次は再帰関数 doCanJump です。 再帰関数 doCanJump はまずいまの要素の値とその位置をたしてみて、もし最後の要素かその以上の位置の要素に届けるなら、JUMPできるとなります。そうでない場合、1から最大まですべての可能性をテストします。すべての可能性でJUMPできるルートがないなら、JUMPできないと返します。

このコード理論上かならずJUMPできるルートを探し出します。ただ、すべてのルートをチェックしているので、最悪の場合、O(N^2) の時間複雑度でルートを探します。一応、コードを改善する方法はあります。例えば

  • ステップ1から最大までではなく、最大からステップ1まで試す
  • 再帰をループにする

しかし、これらの改善策をしても計算量が変わりません。計算量を減らすには、終点(最後の要素)までの要素に「この要素なら終点までJUMPできる」ようなキャッシュを作る方法があります。例えば、配列 [3, 1, 2, 4, 6, 3, 1, 3] という配列で

  • 最後から二番目の要素 1 から終点までJUMPできる
  • 最後から三番目の要素 3 から終点までJUMPできる
  • 最後から四番目の要素 6 から終点までJUMPできる
  • 最後から五番目の要素 4 から終点までJUMPできる
  • 最後から六番目の要素 2 から最後から五番目と四番目までJUMPできる。かつどっちも終点までJUMPできるので、最後六番目からも終点までJUMPできる
  • 最後から七番目の要素 1 から最後から五番目までJUMPできる。かつ最後から五番目が終点までJUMPできるので、最後から七番目も終点までJUMPできる。
  • 最後から八番目の要素 3 から最後から七、六、五番目までJUMPできる。かつどっちも終点までJUMPできるので、最後から八番目つまり最初の要素から終点までJUMPできる。

つまり、最初からではなく、最後からきっと使われるだろうと思う要素を事前に計算すれば、最初の要素からJUMPかどうかはわかります。こういう考えをベースにしたコードです。

class Solution {
    public boolean canJump(int[] nums){
        int n = nums.length;
        if(n == 0) {
            return false;
        }
        if(n == 1) {
            return true;
        }
        boolean[] dp = new boolean[n];
        dp[n - 1] = true;
        for(int i = n - 2; i >= 0; i--) {
            if(i + nums[i] >= n - 1) {
                dp[i] = true;
                continue;
            }
            for(int j = nums[i]; j >= 1; j--) {
                if(dp[i + j]) {
                    dp[i] = true;
                    break;
                }
            }
        }
        return dp[0];
    }
}

要素数が1以上の部分を見てみましょう。名前が dp という配列を作ります。これは「この要素から最後までJUMPできるか」のキャッシュです。もちろん、最後の要素はJUMPできるので、 true にします。次は最後から二番目から各要素を計算します。もし要素の位置と値から最後までかそれ以上かに届けるなら、JUMPできるとなります。もしくは、要素からJUMPできる範囲内にある要素がJUMPできるならこの要素からもJUMPできます。最後最初の要素の計算結果を返します。

計算結果をキャッシュすることで、計算量が回帰関数よりだいぶ減りましたでしょう。ちなみにですが、配列の名前は cache ではなく dp だった理由は、この方法が「Dynamic Programming」(動的計画法)と呼ばれるのです。動的計画法を知らなくても問題ありません。小さいな問題の結果を記録して大きな問題を解くのを覚えればいいです。

解答はここで終わっていません。すべの可能性を確認するので、理論上の計算量もそのまま O(N^2) です。すべての可能性を確認せずこの要素ならきっとJUMPできるような方法があるのでしょうか。

もう一度配列を見てみましょう。例えば [3, 0, 2, 2, 3, 2, 1, 3]。最初の要素 3 から1ステップから3ステップまでJUMPできますが、どれを選択すれば最後までJUMPできますか。すぐ隣の 0 を選択すればJUMPできなくなるのでだめです。次の2つ 2 どれもよさそうですが、一番目の 2 を選ぶより二番目の 2 がいいでしょう。なぜなら、一番目の 2 からJUMPできる位置も、二番目の 2 からもJUMPできます。逆に、二番目の 2 からJUMPできる位置は一番目の 2 からJUMPできない位置があります。もうすこしルール化にすると、

JUMPできる位置の中で、位置+要素の値が一番大きい要素を選ぶ。もし複数いれば、一番右のを選ぶ。

実際やってみましょう。配列 [3, 0, 2, 2, 3, 2, 1, 3] 最初の要素 3 からJUMPできる範囲で、二番目の 2 を選ぶことになります。また、二番目の 2 から、隣の 32 から右の 2 を選びます。選んだ 2 から最後の要素までJUMPできます。これでチェックするルートは一つになり、計算は楽になるでしょう。

以上のルールは「Greedy Algorithm」(貪欲法)と似たようです。コードは以下です。

class Solution {
    public boolean canJump(int[] nums){
        int n = nums.length;
        if(n == 0) {
            return false;
        }
        if(n == 1) {
            return true;
        }
        int current = 0;
        while (true) {
            int step = nums[current];
            if (current + step >= n - 1) {
                return true;
            }
            if (step == 0) {
                return false;
            }
            int max = 0;
            int index = -1;
            for (int i = 1; i <= step; i++) {
                int value = i + nums[current + i];
                if (value >= max) {
                    max = value;
                    index = current + i;
                }
            }
            if (max == 0) {
                return false;
            }
            current = index;
        }
    }
}

この方法と動的計画法の違いといえば、 dp というキャッシュがないことで、利用するメモリの領域が固定だということです。単純にコードを見ると、最悪の場合でも計算量が O(N^2) になります。実際動くと動的計画法より早い感じですが、まだ一番理想的な方法ではありません。

問題の特徴を踏まえて、最初からではなく、最後から逆算してみます。

配列 [S, .... , Ex, Ey, Ez, E] に対して、最後の要素Eに辿り着くには、 Ex、Ey、Ezとそれ以前の要素からのが可能です。もう一つわかるのはEyからEzまでJUMPできるかつEzからEまでJUMPできると、EyからEまでJUMPできます。つまり

Ey -> Ez && Ez -> E => Ey -> E

逆だと成立しないです。ただ条件をつけば、成立します。

Ey -> E => Ey -> Ez && Ez -> E && Ez > 0

なぜなら、EyからEまでJUMPできると、もちろんEzまでもJUMPできる。ただEzからEまでJUMPできるのは、Ezが0以上の必要があります。

問題に戻ると、最初の要素から最後の要素までルートがあると、このルートは必ずEy、Ezを通るか。

考えてみてください。もしルートがEyを通ると、↑のルール条件つき(Ez > 0)でEzも通れるようになります。また、ルートがExを通ると、EyとEzの中で0以上の要素にも通れるようになります。

以上の現象に基づく解答は

class Solution {
    public boolean canJump(int[] nums){
        int n = nums.length;
        if(n == 0) {
            return false;
        }
        if(n == 1) {
            return true;
        }
        int tail = n - 1;
        for(int i = n - 2; i >= 0; i--) {
            if(nums[i] + i >= tail) {
                tail = i;
            }
        }
        return tail == 0;
    }
}

コードが簡単ですが、理解するには時間かかると思います。ここで tail を最後に通った要素の位置にします。 tail の初期値を最後の要素の位置にします。配列の最後から順に、各要素の位置にその値を足して tail に届くならその要素の位置で tail を更新していきます。最後に tail0 の場合は最初から最後までJUMPできるとなります。

いかがでしょうか。一つ簡単そうな問題でも、いろんな考えを元に解決できます。もし時間あれば、ぜひ試してください。